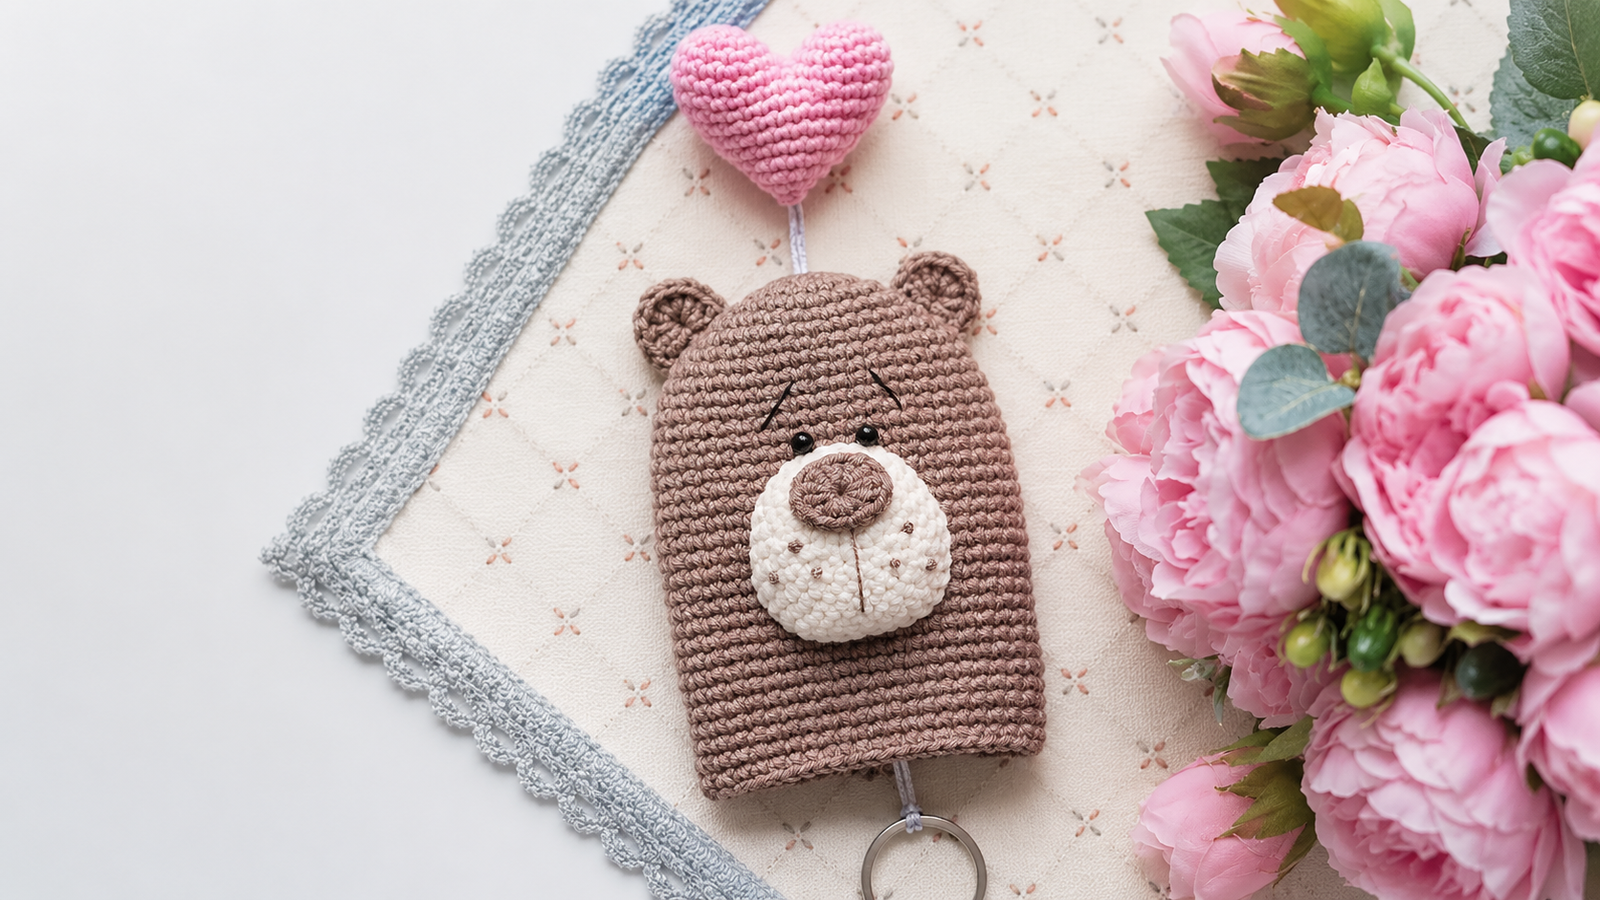
Bear Amigurumi Key Cover with a Heart
This crocheted bear amigurumi is one of those small pieces that wins you over with its details: it has a sweet face, an embroidered muzzle, soft little ears, and a pink heart that works as a decorative detail for the key cover. It is a free step-by-step pattern, ideal if you want to make a practical, cute, and charming accessory.
The design combines a main rectangular bear-shaped piece with a separately crocheted muzzle, ears, nose, and a small amigurumi heart attached to the cord. Although it is a small project, it includes several important finishing details, so it is best to follow the pattern calmly to achieve a neat finish.
If you like crocheted accessories, keychains, key covers, and small amigurumi toys, this pattern is perfect to save, share, and make with leftover
Advertisement / affiliate link. As an Amazon Associate, I earn from qualifying purchases.
Reviewed and organized by Patterns Amigurumis. This pattern was edited to improve readability, preserve the complete rounds, and make the step-by-step crochet process easier to follow.
Amigurumi Technical Sheet
- Difficulty level: beginner-intermediate, because of the assembly, embroidery, and cord system.
- Estimated crochet time: approximately 3 to 5 hours, depending on experience and tension.
- Approximate finished size: may vary depending on the yarn, hook, and tension used.
- Project type: key cover / amigurumi keychain.
- Ideal for: gifts, craft fairs, using as a bag accessory, or protecting a key.
- Main technique: spiral crochet, oval crochet, increases, decreases, sewing, and embroidery.
Materials
- Alize Cotton Gold yarn, 55% cotton and 45% acrylic, 330 m / 50 g.
- Color #62 milk white for the muzzle.
- Color #518 pink for the heart.
- Color #688 cocoa for the main piece and the ears.
- A crochet hook suitable for this type of yarn. In the original pattern, a 2.5 mm hook was used.
- Sewing needles.
- Keychain ring.
- Scissors.
- Safety pins.
- Stuffing, such as holofiber or any similar synthetic material.
- Nylon cord, 1 to 1.5 mm in diameter, approximately 16 inches / 40 cm long.
- One spare bead, 10 to 12 mm in diameter, to use as a stopper.
- 2 plastic beads, 4 mm, for the eyes.
Optional or recommended: you can use a stitch marker to avoid losing the beginning of each round and a fine yarn needle to sew the muzzle and ears, and to hide the yarn tails neatly.
If you have questions about yarns or tools, check our: complete guide to amigurumi materials
If you need help with color changes, you can see our step-by-step guide to changing color in amigurumi.
Abbreviations
- ROUND: round.
- ch: chain.
- MR: magic ring.
- sc: single crochet.
- hdc: half double crochet.
- dc: double crochet.
- inc: increase, crochet 2 stitches in the same stitch.
- dec: decrease, crochet 2 stitches together or make an invisible decrease.
- (…): the number in parentheses indicates the total number of stitches in the round.
- x: repeat the instruction the indicated number of times.
You can review all the techniques in our guide to crochet abbreviations for amigurumi
Before You Start
- Crochet with firm tension so the main piece keeps its key cover shape and does not look too loose.
- Use a stitch marker, especially on the main piece and the heart, because many continuous rounds are worked.
- The heart should be stuffed firmly, just as the pattern indicates, so it keeps a rounded and defined shape.
- Before sewing the muzzle, ears, and eyes, secure everything with pins to check the symmetry of the face.
- Read the entire pattern before starting, especially the part about the cord, the stopper bead, and the final assembly.
Complete Step-by-Step Pattern
Main Body Piece
ROUND 1: 6 sc in MR (6).
ROUND 2: 6 inc (12).
ROUND 3: (inc, 1 sc) x 6 times (18).
ROUND 4: 3 sc, 2 inc, 3 sc, inc, 3 sc, 2 inc, 3 sc, inc (24).
ROUND 5: 4 sc, 2 inc, 10 sc, 2 inc, 6 sc (28).
ROUND 6: 5 sc, 2 inc, 5 sc, inc, 6 sc, 2 inc, 5 sc, inc, 1 sc (34).
ROUND 7: 6 sc, 2 inc, 15 sc, 2 inc, 9 sc (38).
ROUND 8: 8 sc, inc, 18 sc, inc, 10 sc (40).
ROUND 9: 40 sc (40).
ROUND 10: 9 sc, inc, 19 sc, inc, 10 sc (42).
ROUNDS 11-33: 42 sc for 23 rounds (42).
Cut the yarn and hide the remaining tail.
Muzzle
Crochet with milk white yarn.
Make 2 ch + 1 ch for turning the chain.
ROUND 1: inc in the second chain from the hook; 3 sc in the next chain, 1 sc along the other side of the chain (6).
ROUND 2: 6 inc (12).
ROUND 3: (2 inc, 1 sc) x 2 times, 3 inc, 2 sc, inc (20).
ROUND 4: 1 sc, 2 inc, (2 sc, inc) x 2 times, 2 sc, 2 inc, 1 sc, inc, 4 sc, inc (28).
ROUND 5: 7 sc, inc, 4 sc, inc, 7 sc, inc, 6 sc, inc (32).
ROUND 6: 32 sc (32).
Crochet 3 more sc to get an even oval piece. Cut the yarn and hide the tail inside the piece.
Nose
Crochet in a magic ring: 1 sc, 1 hdc, 3 dc, 3 hdc, 3 dc, 1 hdc, 1 sc. Close the circle (13). Fasten off and cut the yarn. Join with the beginning and ending yarn tails of your work.
Carefully secure the thread with the help of a needle.
Ears
Make two ears.
Into the MR: 3 ch, 8 dc.
Pull the MR tight, but do not form a closed circle. Fasten off and cut the yarn. Hide the tail inside the piece.
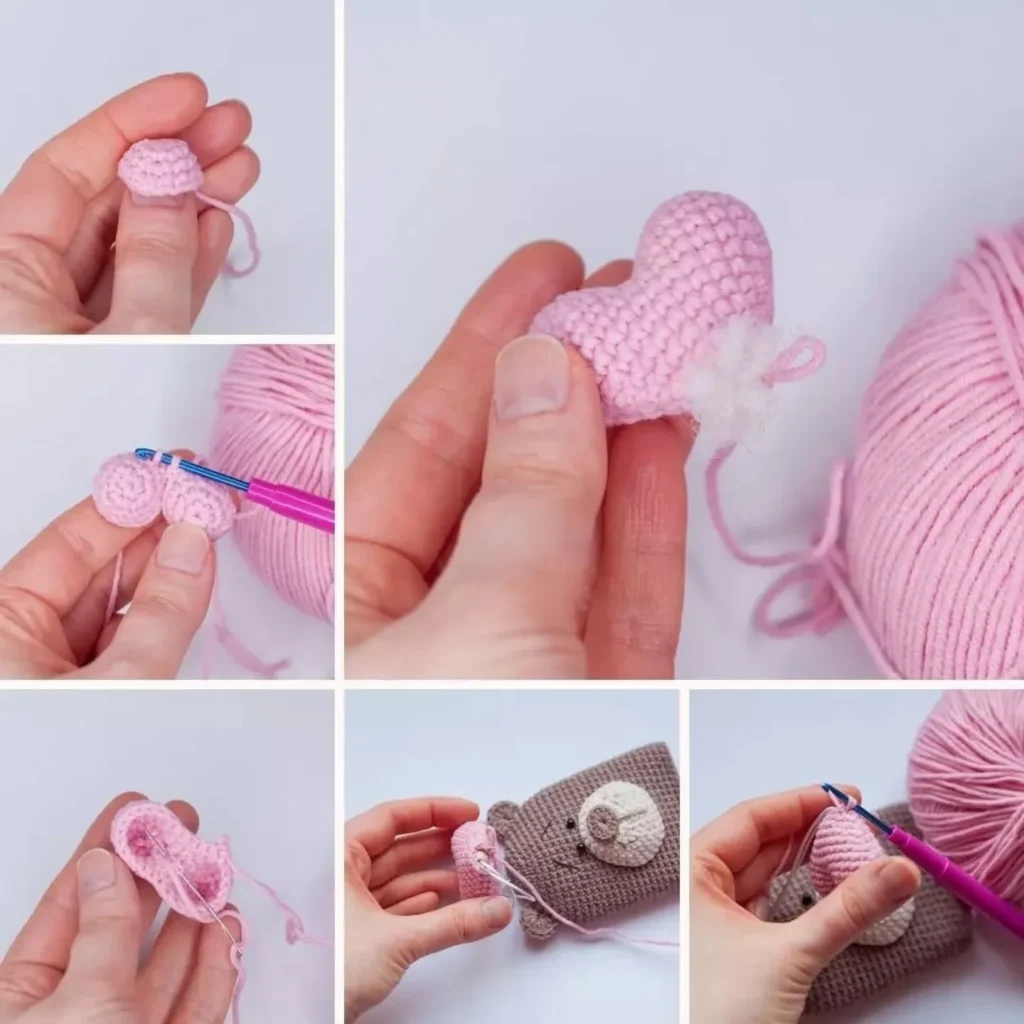
Heart
First, make 2 cups, which will then be joined to form the heart.
ROUND 1: 6 sc in MR (6).
ROUND 2: (inc, 1 sc) x 3 times (9).
ROUND 3: (inc, 2 sc) x 3 times (12).
ROUND 4: (inc, 3 sc) x 3 times (15).
Cut the yarn and leave a long tail of 15 to 20 cm.
Crochet the second cup in the same way, but do not cut the yarn this time.
With the loop from the second cup on the hook, join the pieces to form the heart.
ROUND 5: starting with the stitch next to the last one where you cut the yarn, crochet 15 sc around the first cup. Then crochet 15 sc around the second cup (30).
Please note that the beginning of the round is at the center of the heart. If there is a hole where the two cups were joined, sew it at this stage using the yarn tail from the first cup.
ROUND 6: 30 sc (30).
ROUND 7: 7 sc, dec, 13 sc, dec, 6 sc (28).
ROUND 8: 7 sc, dec, 12 sc, dec, 5 sc (26).
ROUND 9: 7 sc, dec, 11 sc, dec, 4 sc (24).
ROUND 10: 5 sc, 2 dec, 8 sc, 2 dec, 3 sc (20).
ROUND 11: 4 sc, 2 dec, 6 sc, 2 dec, 2 sc (16).
ROUND 12: 3 sc, 2 dec, 4 sc, 2 dec, 1 sc (12).
Stuff the heart at this point. It is recommended to stuff it as firmly as possible. When you finish stuffing, insert the stopper bead located at the end of the cord into the opening and continue crocheting.
ROUND 13: 2 sc, 2 dec, 2 sc, 2 dec (8).
ROUND 14: 4 dec (4).
Fasten off, close the hole, cut the yarn, and hide the tail inside the piece.
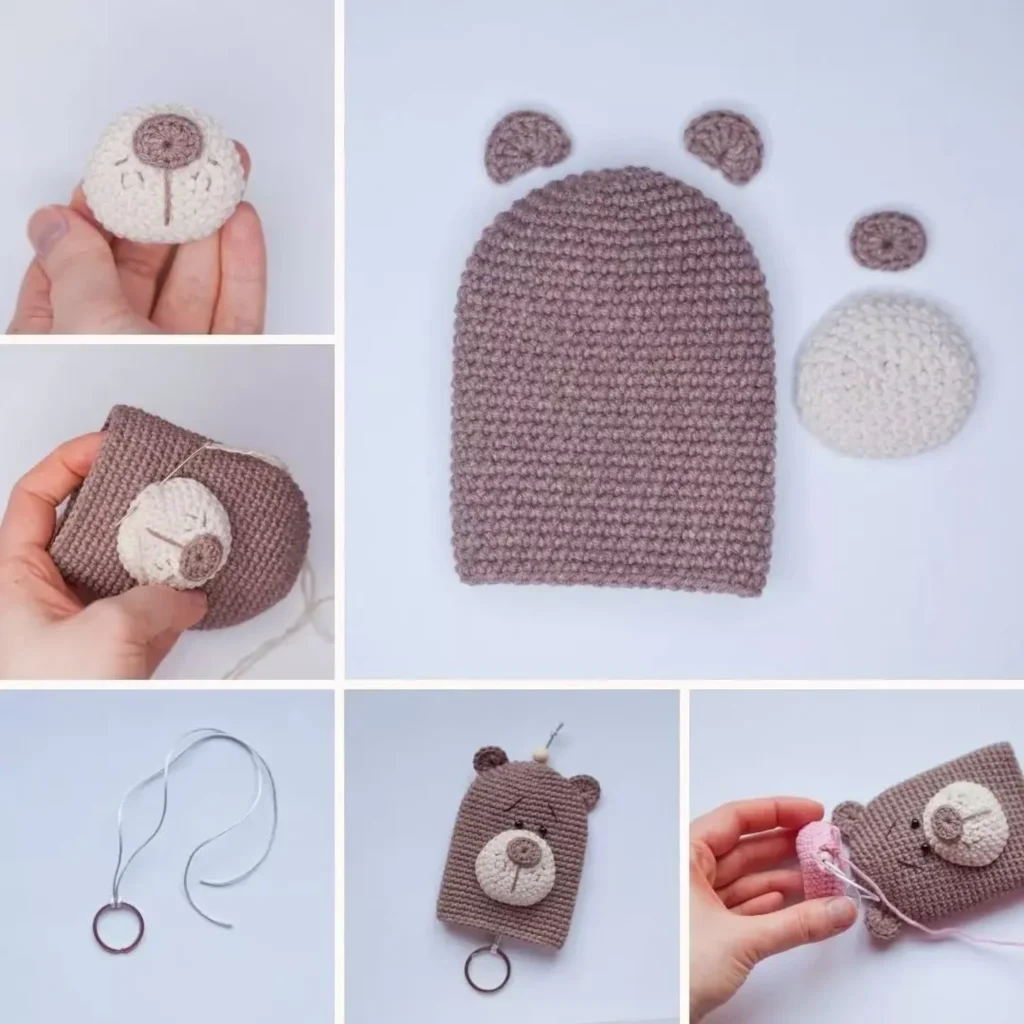
Assembly and Finishing
At this point, finish the bear completely: sew on the nose, embroider the specks on the muzzle, and sew the muzzle to the main piece.
In the original pattern, the muzzle was sewn on with the wrong side facing out. Sew on the ears and eyes as well. Then embroider the brows with black thread.
The muzzle was placed between rounds 13 and 26. For a neater result, it is recommended to split the yarn and use two of the four strands instead of sewing with a thick thread.
Fix the cord to the ring as shown in the photo from the original pattern. Feed the cord through the magic ring opening of the main piece.
Place the spare bead as a stopper to prevent the knot from slipping out when the cover is in use. Measure a comfortable cord length and tie a knot. Cut the remaining ends.
Your key cover is ready. Enjoy it!
My Experience and Tips for Crocheting This Amigurumi
When reviewing this pattern, the most important thing for the bear to look beautiful is taking care of the shape of the main piece. Since it works as a key cover, it is best not to crochet too loosely: even tension helps the body keep its shape and allows the cord mechanism to slide better.
I would also pay close attention to the muzzle. It is a small piece, but it defines the entire expression of the bear. Before sewing it permanently, it is a good idea to secure it with pins between the indicated rounds and look at the piece from the front. If it is even slightly crooked, it will be quite noticeable on such a simple little face.
For the eyes, the pattern uses 4 mm plastic beads. If the piece is going to be used by small children, it is safer to embroider the eyes with thread, because beads can come loose with use. On the other hand, if it will be a decorative accessory for an adult, the beads give it a very sweet and delicate shine.
The heart should be well stuffed so it keeps its shape. My advice is to add the stuffing little by little, gently pushing it toward the upper cups before closing. It does not need to be packed so tightly that the piece becomes distorted, but it should be stuffed enough so the heart does not look flat.
For the final seams, using a thinner strand or splitting the yarn helps a lot. This type of accessory is viewed up close, so neat sewing on the muzzle, ears, and nose makes the finish look much more professional.
Frequently Asked Questions
Can I crochet this key cover with another yarn?
Yes, you can use another yarn with a similar thickness. Just keep in mind that the finished size may change and that you may need to adjust the hook size so the fabric stays firm.
Can I embroider the eyes instead of using beads?
Yes. In fact, if the cover will be used by a child or by a piece that will get a lot of use, embroidering the eyes may be a safer option than using plastic beads.
How do I keep the muzzle from looking crooked?
Before sewing, secure the muzzle with pins between rounds 13 and 26, check the symmetry from the front, and only then sew it with small stitches. This helps keep the face balanced.
Pattern Credits
The original pattern is by designer @ma_ra_boo
Did you try crocheting it? Leave me a comment or share it on social media using #PatternsAmigurumi so I can see it.
Before you start: useful supplies for this amigurumi
Check yarn, eyes, stuffing, and accessories before crocheting so you do not get stuck halfway through the project.
- Cotton yarnPick similar colors before you start.View options
- Yarn needleEssential for sewing pieces and hiding ends.View options
- Crochet hookThe right size keeps stitches firm and neat.View options
- PinsUseful for positioning pieces before sewing.View options
- Safety noseA small detail that improves the finish.View options
- Safety eyesAdds a clean, even expression to the doll.View options
Links open Amazon searches related to each material.
Leave a reply