Floral Hat Amigurumi Gnome: Free Step-by-Step Pattern
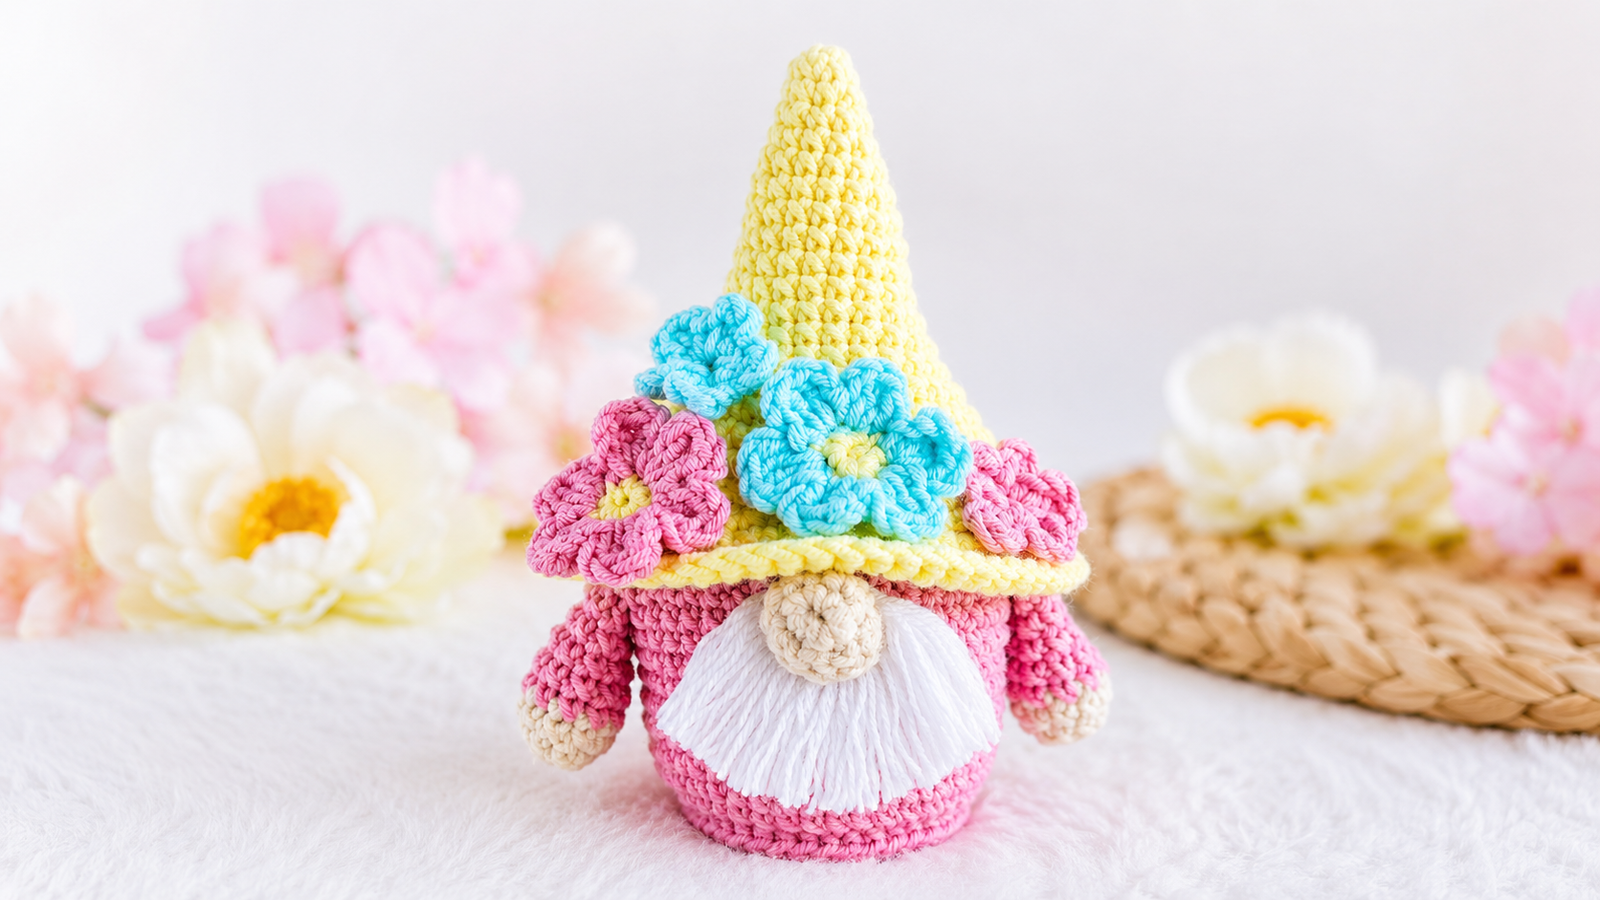
This little amigurumi gnome is one of those projects that wins you over with its sweetness: it has a rounded body, a tall crocheted hat, and an ideal shape for using it as an ornament, a small gift, or even a decorative holder. If you love crocheted dolls with sweet details and soft colors, this free pattern is a beautiful option to save and crochet calmly.
The design combines simple crochet pieces, rounds in single crochet, increases, and a few finishing details that shape the amigurumi toy. In addition, the body can be stuffed with
Advertisement / affiliate link. As an Amazon Associate, I earn from qualifying purchases.
Crocheted gnomes are very popular in the amigurumi world because they bring a cozy, magical, and handmade feeling. In this case, the tall hat and the combination of pink, yellow, nude, and white make it a delicate crocheted doll, perfect for decorating, gifting, or adding to a sweet table.
Reviewed and organized by Patterns Amigurumis. This pattern was edited to improve readability, preserve the complete rounds, and make the step-by-step crochet process easier to follow.
Amigurumi Technical Details
- Difficulty level: easy, according to the original pattern.
- Estimated crochet time: approximately 2 to 4 hours; this may vary depending on your experience and finishing details.
- Approximate finished size: 11 to 12 cm tall using the indicated materials.
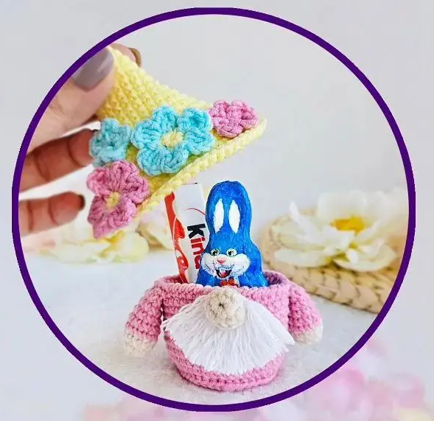
- Project type: decorative amigurumi gnome or small holder.
- Ideal for: gifts, decoration, table details, or quick crochet projects.
- Main technique: single crochet, increases, working in BLO and FLO, and sewing pieces together.
Materials
- 50 g / 160 m sport yarn:
- Yellow: YarnArt Jeans 67.
- Pink: YarnArt Jeans 20 or 36.
- Nude: YarnArt Jeans 05 or 73.
- White: YarnArt Jeans 62.
Suggested kitBefore you start: useful supplies for this amigurumi
Check yarn, eyes, stuffing, and accessories before crocheting so you do not get stuck halfway through the project.
- Crochet hookThe right size keeps stitches firm and neat.View options
- StuffingSoft filling for shaping without distorting.View options
- toy stuffingA practical way to gather supplies quickly.View options
- PinsUseful for positioning pieces before sewing.View options
- Safety noseA small detail that improves the finish.View options
- Safety eyesAdds a clean, even expression to the doll.View options
Links open Amazon searches related to each material.
- Crochet hook: 2.00 mm.
- Stuffing: polyester fiberfill or toy stuffing, optional.
If you use these materials, the finished doll measures approximately 11 to 12 cm tall. The original pattern notes that it does not include basic crochet instructions and assumes that you already know the main stitches. It also indicates that it uses United States crochet terminology.
If you have questions about yarns or tools, check our: complete guide to amigurumi materials
If you need help with color changes, you can see our step-by-step guide on changing color in amigurumi.
Abbreviations
- R: round.
- MR: magic ring.
- sc: single crochet.
- inc: increase.
- sl st: slip stitch.
- BLO: work through the back loop only.
- FLO: work through the front loop only.
You can review all the techniques in our guide to crochet abbreviations for amigurumi
Before You Start
- Use a stitch marker from the beginning, especially on the body and hat, because several sections are worked in continuous rounds.
- Keep an even tension so the body stays firm and the hat keeps its tall shape.
- Round 6 of the body is worked in BLO, and then the front loops are used later to make the lower finish; it is a good idea to mark that round if it makes things easier for you.
- Stuffing is optional: you can stuff the body so it becomes a decorative doll or leave it empty to use it as a holder.
- Read the entire pattern before starting, because some pieces are sewn to specific rounds of the body.
Complete Step-by-Step Pattern
Body
Crochet with pink yarn.
ROUND 1: 8 sc in a magic ring. Total: 8 stitches.
ROUND 2: 8 inc. Total: 16 stitches.
ROUND 3: repeat 8 times: 1 sc, 1 inc. Total: 24 stitches.
ROUND 4: repeat 8 times: 2 sc, 1 inc. Total: 32 stitches.
ROUND 5: repeat 8 times: 3 sc, 1 inc. Total: 40 stitches.
ROUND 6: work in BLO only: 40 sc. Total: 40 stitches.
ROUND 7: repeat 5 times: 7 sc, 1 inc. Total: 45 stitches.
ROUNDS 8 TO 15: 45 sc in each round for 8 rounds. Total: 45 stitches per round.
Now make a finishing round.
ROUND 16: repeat 45 times: 1 sc, turn the work. Total: 45 stitches.
You can also simply make 45 sc.
Make 1 sl st, fasten off, and cut the yarn. Hide the yarn tail inside the body or leave a tail for sewing.
Now join the pink yarn to the front loops that were left free in Round 6. Crochet 40 sc with the body turned upside down. Make 1 sl st, fasten off, and hide the yarn tail inside.
You can stuff the body with polyester fiberfill or leave it empty to use it as a holder.
Hat
Crochet with yellow yarn.
ROUND 1: 6 sc in a magic ring. Total: 6 stitches.
ROUND 2: 6 sc. Total: 6 stitches.
ROUND 3: repeat 3 times: 1 sc, 1 inc. Total: 9 stitches.
ROUND 4: 9 sc. Total: 9 stitches.
ROUND 5: repeat 3 times: 2 sc, 1 inc. Total: 12 stitches.
ROUND 6: 12 sc. Total: 12 stitches.
ROUND 7: repeat 3 times: 3 sc, 1 inc. Total: 15 stitches.
ROUND 8: 15 sc. Total: 15 stitches.
ROUND 9: repeat 3 times: 4 sc, 1 inc. Total: 18 stitches.
ROUND 10: 18 sc. Total: 18 stitches.
ROUND 11: repeat 3 times: 5 sc, 1 inc. Total: 21 stitches.
ROUND 12: repeat 3 times: 6 sc, 1 inc. Total: 24 stitches.
ROUND 13: repeat 3 times: 7 sc, 1 inc. Total: 27 stitches.
ROUND 14: repeat 3 times: 8 sc, 1 inc. Total: 30 stitches.
ROUND 15: repeat 3 times: 9 sc, 1 inc. Total: 33 stitches.
ROUND 16: repeat 3 times: 10 sc, 1 inc. Total: 36 stitches.
ROUND 17: repeat 6 times: 5 sc, 1 inc. Total: 42 stitches.
ROUND 18: repeat 6 times: 6 sc, 1 inc. Total: 48 stitches.
ROUNDS 19 TO 20: 48 sc in each round for 2 rounds. Total: 48 stitches per round.
ROUND 21: repeat 16 times: 2 sc, 1 inc. Total: 64 stitches.
ROUNDS 22 TO 23: 64 sc in each round for 2 rounds. Total: 64 stitches per round.
Make 1 sl st, fasten off, and cut the yarn. Hide the yarn tail inside.
If you want, you can stuff the hat with polyester fiberfill and sew it to the body around the rounds of Round 20.
Arms
Start crocheting with nude yarn.
ROUND 1: 5 sc in a magic ring. Total: 5 stitches.
ROUND 2: 5 inc. Total: 10 stitches.
ROUND 3: 10 sc. Total: 10 stitches.
Change to pink.
ROUNDS 4 TO 8: 10 sc in each round for 5 rounds. Total: 10 stitches per round.
Make 1 sl st, fasten off, and cut the yarn, leaving a tail for sewing.
You can stuff only the lower part of the arms.
Assembly and Finishing
- If you decide to stuff the body, place the polyester fiberfill evenly, without packing it too tightly so the base does not become misshapen.
- If you prefer to use the body as a holder, leave it empty as indicated in the original pattern.
- Stuff the hat optionally and sew it to the body, using the area around Round 20 of the hat as a reference.
- Sew the arms to the sides of the body, positioning them at Round 15.
- Before securing the final seams, check that both arms are symmetrical and that the hat is centered.
- Hide all remaining yarn tails inside the fabric for a neat finish.
My Experience and Tips for Crocheting This Amigurumi
When reviewing and organizing this pattern, the most important thing for making the gnome look neat is to control the tension from the body onward. The base is built with many single crochet stitches and increases, so even tension helps the rounded shape stay closed and prevents the stuffing from showing through.
In Round 6 of the body, it is worth paying attention to the BLO, because the front loops are later used to make the lower finish. If that round is well marked, it will be much easier to attach the pink yarn later and complete that part without losing stitches.
I also recommend trying the hat on the body before sewing it permanently. Since it is a tall piece, a small change in tension can affect how it sits on the doll. If you decide to stuff it, do it gradually so it keeps its shape without becoming stiff.
For the arms, stuffing only the lower part helps them have volume without becoming too firm. When sewing them at Round 15, hold them first with pins or a few temporary stitches to check that they are at the same height.
If the amigurumi will be for a small child, avoid poorly secured small decorative pieces and reinforce all seams. Firm finishing is just as important as the crochet itself, especially for dolls that will be handled often.
Frequently Asked Questions
Can I use another type of yarn?
Yes, you can use a similar yarn, but the final size may change. If you use thicker yarn, the gnome will be larger; if you use thinner yarn, it will be smaller. Ideally, you should also adapt the hook size so the crochet fabric stays tight.
Is it mandatory to stuff the body?
No. The original pattern indicates that you can stuff the body with polyester fiberfill or leave it empty to use it as a holder. If you want it as a decorative doll, stuffing helps give it shape; if you want it as a holder, it is best to leave it unstuffed.
How do I keep the hat from looking crooked?
Before sewing, place the hat on the body and check the position from the front and sides. You can hold it with pins or loose stitches first, and only then sew it permanently.
Pattern Credits
This is a pattern by Marizza Toys.
Did you crochet it? Leave me a comment or share it on social media using #PatternsAmigurumi so I can see it.
Leave a reply