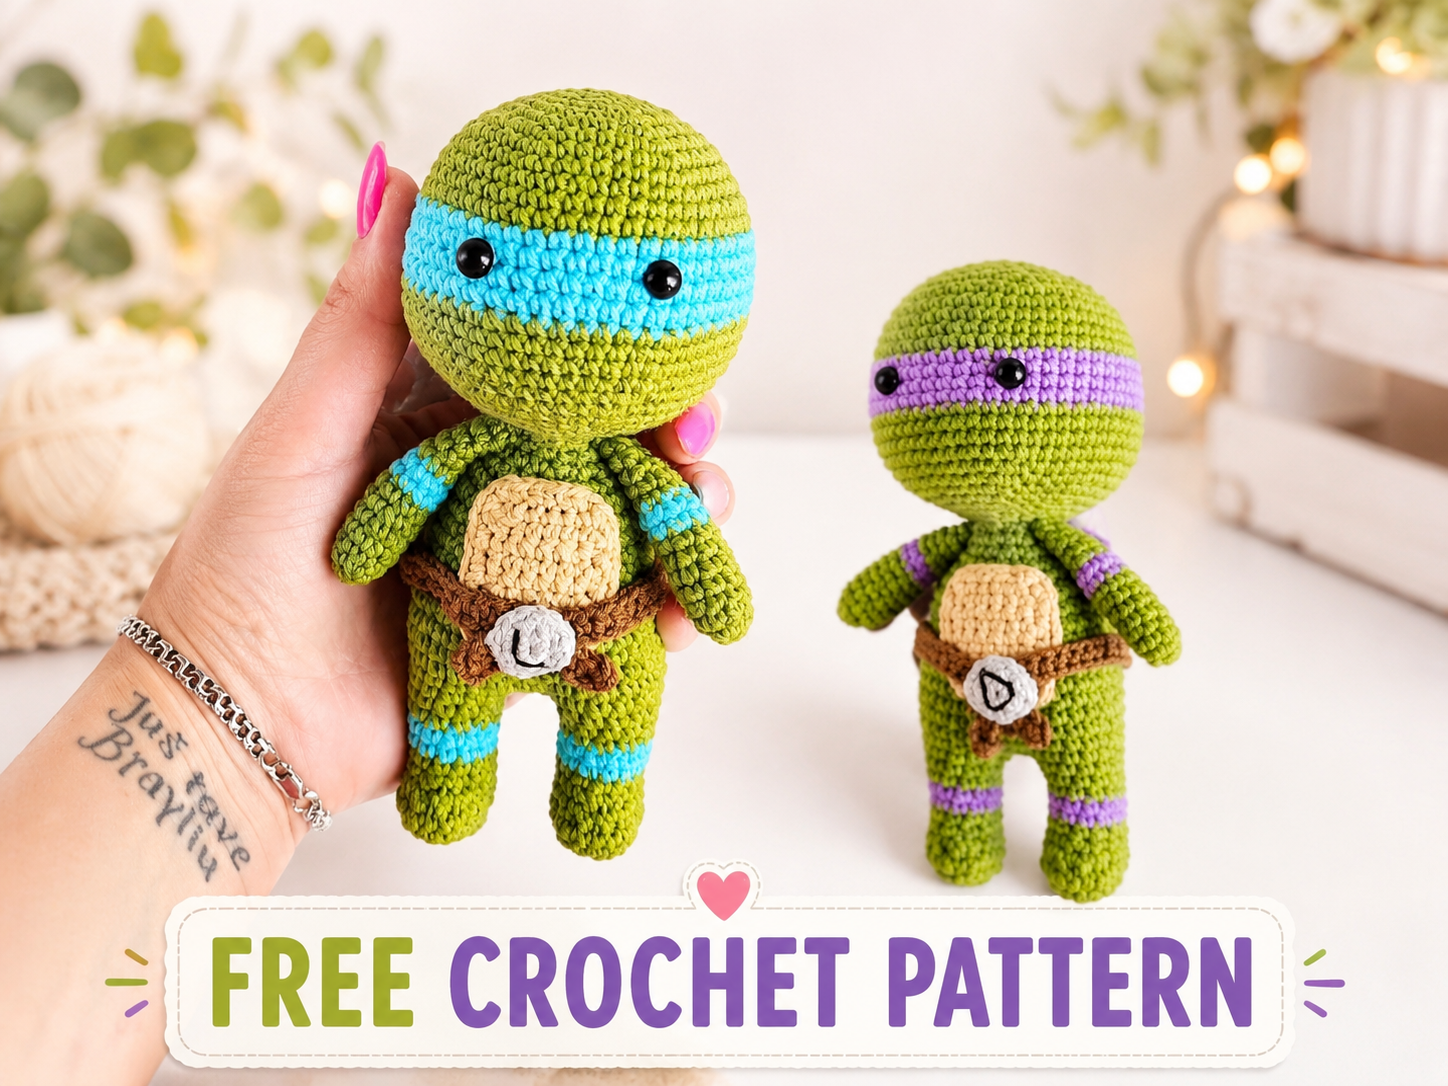
Are you looking for a project that brings back nostalgia and sparks creativity? Crocheting the iconic Ninja Turtles (Leonardo, Donatello, Michelangelo, or Raphael) is a fantastic adventure. This free pattern will teach you step by step how to create your own crocheted doll inspired by these legendary heroes in a half shell who marked an entire generation since the 1980s. The Ninja Turtles are famous for their love of pizza and their ninja skills, and now you can have them as an amigurumi toy. Grab your crochet hook, choose the mask color of your favorite turtle, and get ready to bring an incredible, detail-filled amigurumi to life.
Materials
- 2.00 mmcrochet hook.
Advertisement / affiliate link. As an Amazon Associate, I earn from qualifying purchases.
- YarnArt Jeans yarn (55% cotton, 45% acrylic, 50g/160m), in the following colors: green, blue (or the mask color you prefer), gray, brown, and light brown.
- 8 mm black safety eyes.
- Silicone fiberfill (toy stuffing).
- Yarn needle (tapestry needle).
- Stitch marker.
- Black embroidery thread (for the belt letter).
If you have questions about yarns or tools, check out our complete guide to amigurumi materials.
If you need help with color changes, you can see our step-by-step guide for changing color in amigurumi.
Abbreviations
- MR: Magic ring
- sc: Single crochet
- ch: Chain
- sl st: Slip stitch
- inc: Increase
- dec: Invisible decrease
- dc: Double crochet
- hdc: Half double crochet
- (… ) x n: repeat the instructions inside the parentheses n times.
You can review all the techniques in our guide to crochet abbreviations for amigurumi.
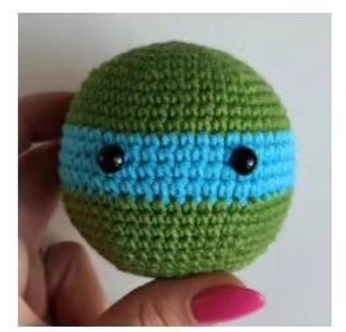
Head
Crochet with green yarn.
ROUND 1: 6 sc in MR (6)
ROUND 2: 6 inc (12)
ROUND 3: (1 sc, inc) x 6 (18)
ROUND 4: (2 sc, inc) x 6 (24)
ROUND 5: (3 sc, inc) x 6 (30)
ROUND 6: (4 sc, inc) x 6 (36)
ROUND 7: (5 sc, inc) x 6 (42)
ROUND 8: (6 sc, inc) x 6 (48)
ROUND 9: 48 sc (48)
ROUND 10: 48 sc (48)
ROUND 11: 48 sc (48)
ROUND 12: 48 sc (48)
Change to blue yarn (or the mask color).
ROUND 13: 48 sc (48)
ROUND 14: 48 sc (48)
ROUND 15: 48 sc (48)
ROUND 16: 48 sc (48)
Change to green yarn.
ROUND 17: (7 sc, inc) x 6 (54)
ROUND 18: 54 sc (54)
ROUND 19: 54 sc (54)
ROUND 20: 54 sc (54)
ROUND 21: (7 sc, dec) x 6 (48)
ROUND 22: (6 sc, dec) x 6 (42)
ROUND 23: (5 sc, dec) x 6 (36)
ROUND 24: (4 sc, dec) x 6 (30)
Place the safety eyes between rounds 14 and 15, with 8 stitches between them. Begin stuffing the head firmly.
ROUND 25: (3 sc, dec) x 6 (24)
ROUND 26: (2 sc, dec) x 6 (18)
ROUND 27: (4 sc, dec) x 3 (15)
Fasten off and cut the yarn.
Arms (Make 2)
Crochet with green yarn.
ROUND 1: 6 sc in MR (6)
ROUND 2: (2 sc, inc) x 2 (8)
ROUND 3: 8 sc (8)
ROUND 4: 8 sc (8)
ROUND 5: 8 sc (8)
ROUND 6: 8 sc (8)
ROUND 7: 8 sc (8)
Change to blue yarn (arm band).
ROUND 8: 8 sc (8)
ROUND 9: 8 sc (8)
Change to green yarn.
ROUND 10: 8 sc (8)
ROUND 11: 8 sc (8)
ROUND 12: 8 sc (8)
ROUND 13: 8 sc (8)
ROUND 14: 8 sc (8)
Do not stuff the arms. This way, the arm will not stick out too much after it is sewn to the body. Press the opening with your fingers, align 4 stitches on each side, and crochet 1 sc through both sides at the same time (4 sc). Fasten off and leave a long yarn tail for sewing.
Legs and Body
Stuff the legs, body, and head firmly, stuffing as you go.
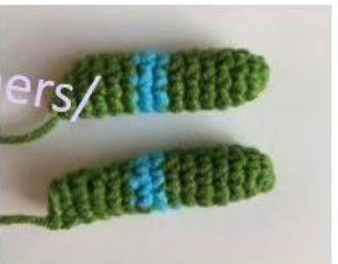
Leg 1
Start with green yarn.
ROUND 1: 6 sc in MR (6)
ROUND 2: 6 inc (12)
ROUND 3: (1 sc, inc) x 6 (18)
ROUND 4: 18 sc (18)
ROUND 5: 6 sc, 4 dec, 4 sc (14)
ROUND 6: 6 sc, 2 dec, 4 sc (12)
ROUND 7: 12 sc (12)
Change to blue yarn (knee band).
ROUND 8: 12 sc (12)
ROUND 9: 12 sc (12)
Change to green yarn.
ROUND 10: 12 sc (12)
ROUND 11: Crochet 11 sc. Fasten off and cut the yarn.
Leg 2 and Body
Start with green yarn. Repeat the Leg 1 pattern from ROUND 1 to ROUND 10.
ROUND 11: 12 sc (12). Do not cut the yarn. Crochet 5 additional sc. Move the stitch marker to the last loop. Stuff the legs.
ROUND 12: Make 3 ch, join to the first leg by making 1 sc. Make 11 sc around that leg, 3 sc along the chain of 3, and 12 sc around the second leg (30). Note: The beginning of the rounds should be at the back of the doll.
ROUND 13: 9 sc, inc, 14 sc, inc, 5 sc (32). The increases should be positioned at the sides.
ROUND 14: 32 sc (32)
ROUND 15: 32 sc (32)
ROUND 16: 32 sc (32)
ROUND 17: 32 sc (32)
ROUND 18: 32 sc (32)
ROUND 19: 9 sc, dec, 14 sc, dec, 5 sc (30)
ROUND 20: 30 sc (30)
ROUND 21: 30 sc (30)
ROUND 22: 30 sc (30)
ROUND 23: 30 sc (30)
ROUND 24: 30 sc (30)
ROUND 25: (3 sc, dec) x 6 (24)
ROUND 26: (2 sc, dec) x 6 (18)
ROUND 27: (4 sc, dec) x 3 (15)
ROUND 28: 15 sc (15). Leave a long yarn tail for sewing. Stuff the body firmly.
Front Shell
Use light brown yarn.
ROW 1: 8 ch, start in the 2nd ch from the hook, 7 sc (7)
ROW 2: 1 ch, turn the work, 7 sc (7)
ROW 3: 1 ch, turn the work, 7 sc (7)
ROW 4: 1 ch, turn the work, 7 sc (7)
ROW 5: 1 ch, turn the work, 7 sc (7)
ROW 6: 1 ch, turn the work, 7 sc (7)
ROW 7: 1 ch, turn the work, 7 sc (7)
ROW 8: 1 ch, turn the work, dec, 3 sc, dec (5)
ROW 9: 1 ch, turn the work, dec, 1 sc, dec (3). Do not cut the yarn.
Crochet sc evenly around the entire edge of the front shell, working 2 sc into the corners to help turn. Fasten off and leave a long yarn tail for sewing.
Back Shell
Use dark brown yarn.
ROUND 1: 6 sc in MR (6)
ROUND 2: 6 inc (12)
ROUND 3: (3 sc, 3 inc) x 2 (18)
ROUND 4: (6 sc, 3 inc) x 2 (24)
ROUND 5: (9 sc, 3 inc) x 2 (30)
ROUND 6: (12 sc, 3 inc) x 2 (36)
ROUND 7: 36 sc (36)
ROUND 8: 36 sc (36)
Fasten off and leave a long yarn tail for sewing.
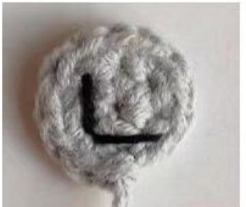
Belt Buckle
Use gray yarn.
ROUND 1: 6 sc in MR (6)
ROUND 2: 6 inc (12). Fasten off. Leave a long yarn tail for sewing.
With black embroidery thread, embroider a letter on the buckle (L, R, D, or M depending on the turtle) and tie the ends at the back. Sew the buckle to the front of the belt.
Belt
Use dark brown yarn.
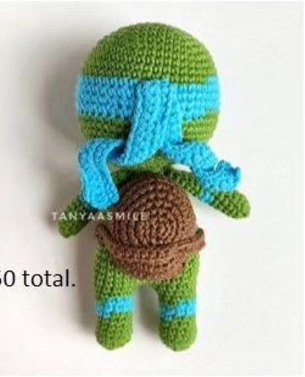
Crochet as many chains as you need to wrap around your turtle. In the original pattern, 50 chains were needed in total.
ROW 1: 50 ch, start in the 2nd ch from the hook, 49 hdc (49)
Fasten off. Leave a long yarn tail for sewing.
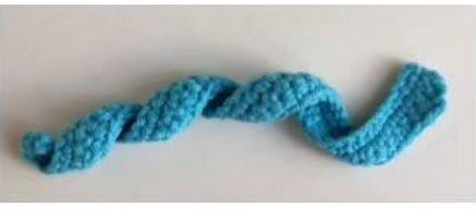
Mask Ties
Use blue yarn (or the chosen mask color).
ROW 1: 55 ch, start in the 2nd ch from the hook, 54 sc (54)
ROW 2: 1 ch, turn the work, 54 sc (54)
ROW 3: 1 ch, turn the work, 54 sc (54)
Fasten off and leave a long yarn tail for sewing.
Assembly and Finishing
- Sew the head to the body.
- Sew the arms to the body symmetrically.
- Sew the front shell to the body.
- Sew the back shell to the back of the body.
- Sew the belt around the turtle.
- Cut a piece of yarn in the mask color and use it to sew the tie (the knot) to the back of the head.
My Tips and Experience
As a crocheter who is passionate about amigurumi, I have noticed that the secret to making these Ninja Turtles turn out perfectly is in the shell and the proportions. When I crochet the back shell, I like to make sure I do not overstuff it before sewing it on; just a little bit of fiberfill right in the center gives it that domed volume without making it look like a ball on the back.
Another essential tip: when making the color changes for the knee pads and elbow pads, make sure to complete the final yarn-over of the previous stitch with the new color. This will give you super clean transition lines. Also, when aligning the safety eyes, place them well centered within the blue mask band (and remember to attach the safety backs on the inside before closing the head!). Take your time pinning all the pieces in place (arms, shell, and belt) before making the first stitch; this will save you from having to undo sewing if something ends up crooked.
Original pattern credits: Design created by Tanyaasmile. If you publish your finished amigurumi, remember to tag her or use the hashtag #tssmile_dolls.
Did you dare to crochet it? Leave me a comment or share it on social media using #PatternsAmigurumi so I can see it.
Before you start: useful supplies for this amigurumi
Check yarn, eyes, stuffing, and accessories before crocheting so you do not get stuck halfway through the project.
- Safety eyesAdds a clean, even expression to the doll.View options
- Yarn needleEssential for sewing pieces and hiding ends.View options
- Crochet hookThe right size keeps stitches firm and neat.View options
- toy stuffingA practical way to gather supplies quickly.View options
- embroidery threadA practical way to gather supplies quickly.View options
- Safety noseA small detail that improves the finish.View options
Links open Amazon searches related to each material.
Leave a reply