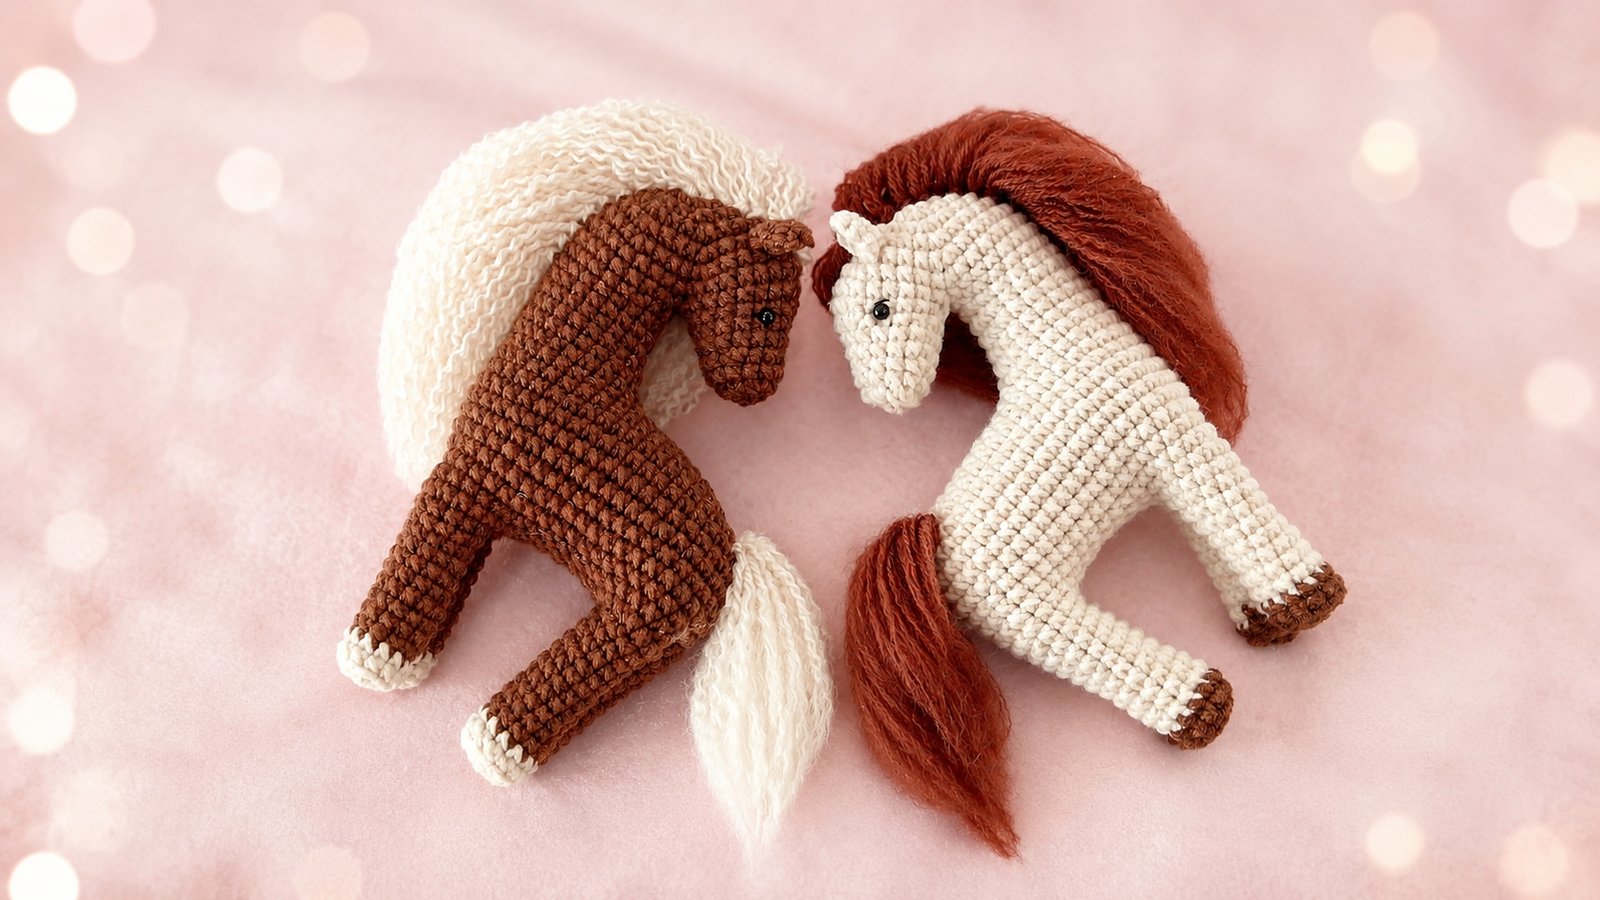
This pony amigurumi is one of those projects that wins you over with its details: the small body, the curved shape of the neck, the integrated legs, and a fluffy mane that gives it so much personality. If you enjoy crocheted toys with a sweet and delicate look, this free pattern is a beautiful option to save and crochet calmly.
In this step-by-step crochet tutorial, you will find the complete construction of the amigurumi toy, from the initial base to the final assembly with ears, eyes, mane, and tail. It is an ideal crocheted toy for those who already have some experience with amigurumi and want to try a different structure, with the body and legs formed directly from the main piece.
Crocheted ponies and little horses are usually very loved because they combine sweetness, movement, and fantasy. In this design, the mane and tail, separated strand by strand, create a soft and very special finish. Keep reading to crochet the complete pattern and preserve all the original details.
Reviewed and organized by Patterns Amigurumis. This pattern was edited to improve readability, preserve the complete rounds, and make the step-by-step crochet process easier to follow.
Amigurumi technical details
- Difficulty level: intermediate, especially because of the piece division, the integrated legs, and the mane assembly.
- Estimated crochet time: approximately 4 to 6 hours; this may vary depending on experience and sewing speed.
- Approximate final size: small, designed as a palm-sized pony; the size may vary depending on yarn thickness, tension, and stuffing.
- Project type: amigurumi crocheted toy with body, legs, ears, mane, and tail.
- Ideal for: gifting, decorating, collecting, or using as a handmade detail.
- Main technique: spiral crochet with single crochet stitches, increases, decreases, color changes, and sewn assembly.
Materials
- Brown yarn for the pony’s body.
- Light beige yarn for the hooves, mane, and tail.
- 2 mmcrochet hook, as indicated in the original pattern.
Advertisement / affiliate link. As an Amazon Associate, I earn from qualifying purchases.
- Stuffing for amigurumi.
- Black bead eyes.
- Yarn needle or needle for sewing pieces.
- Stitch markers.
- Pins to hold the pieces before sewing.
- Scissors.
- Slicker brush or brush for fluffing, optional for brushing the mane and tail.
If you have questions about yarns or tools, check our: complete guide to materials for amigurumi
If you need help with color changes, you can see our step-by-step guide to changing color in amigurumi.
Abbreviations
- ROUND: round.
- ch: chain.
- MR: magic ring.
- sc: single crochet.
- inc: increase, crochet 2 single crochet stitches in the same stitch.
- dec: decrease.
- BLO: crochet through the back loop only.
You can review all the techniques in our guide to crochet abbreviations for amigurumi
Before you start
- Read the entire pattern before starting, because the head, neck, body, and legs are formed with one continuous construction, and it is helpful to understand the direction of the crochet work.
- Use a round marker from the beginning, especially when dividing the piece into two parts and later when distributing the stitches for the legs.
- Keep firm tension so the stuffing does not show through, but do not crochet too tightly around the neck and legs.
- Carefully stuff the body and legs before closing the belly, shaping the pony neatly.
- For the mane and tail, separate the strands patiently: that detail is what creates the final fluffy effect.
Complete step-by-step pattern
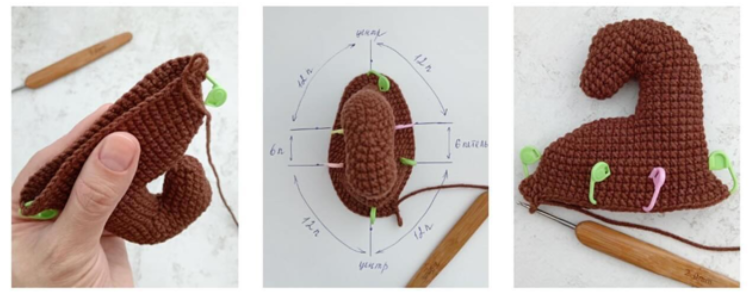
Beginning of the main piece
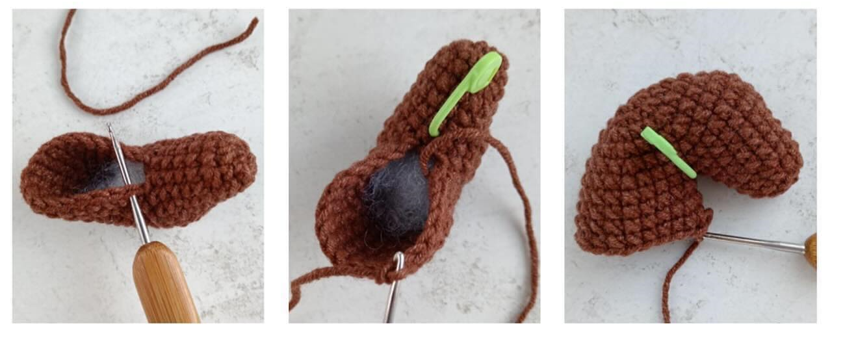
In this example, start with brown yarn and a 2 mm crochet hook.
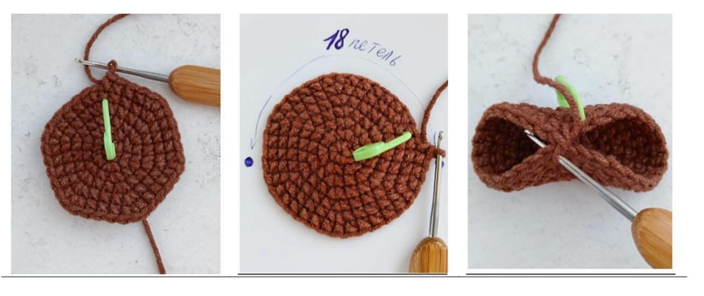
ROUND 1: 6 sc in MR (6).
ROUND 2: crochet 2 sc in each stitch (12).
ROUND 3: 1 sc, inc; repeat 6 times (18).
ROUND 4: 2 sc, inc; repeat 6 times (24).
ROUND 5: 3 sc, inc; repeat 6 times (30).
ROUND 6: 4 sc, inc; repeat 6 times (36).
ROUND 7: crochet sc without changes (36).
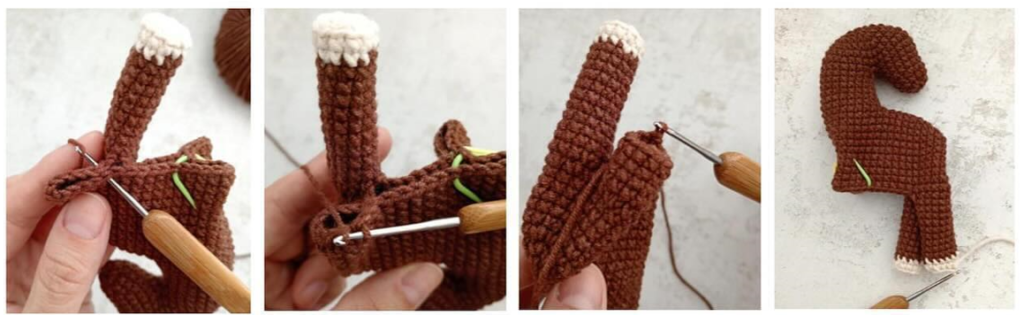
Do not cut the yarn. Divide the piece in half, into 18 stitches and 18 stitches. Fold and close in the center, forming a kind of “eight”, with the right side facing out. Crochet each part separately. The beginning of the round is counted from the place of the central join.
Muzzle
Continue crocheting with the same yarn, in the round.
ROUND 1: crochet sc without changes (18).
ROUND 2: 6 sc; dec, repeat 3 times; 6 sc (15).
ROUNDS 3-4: crochet 2 rounds of sc without changes (15).
ROUND 5: 3 sc, dec; repeat 3 times (12).
ROUND 6: crochet sc without changes (12).
ROUND 7: dec; repeat 6 times (6).
Cut the yarn. Tighten and close the opening with a needle or with crochet. Hide the yarn tails.
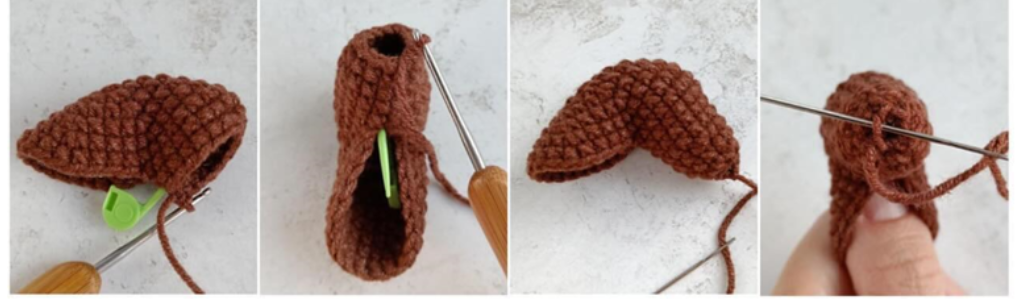
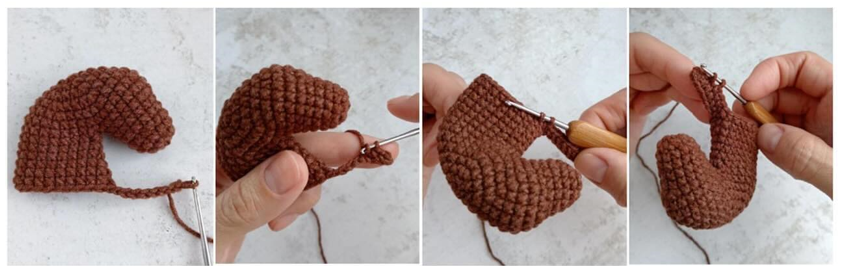
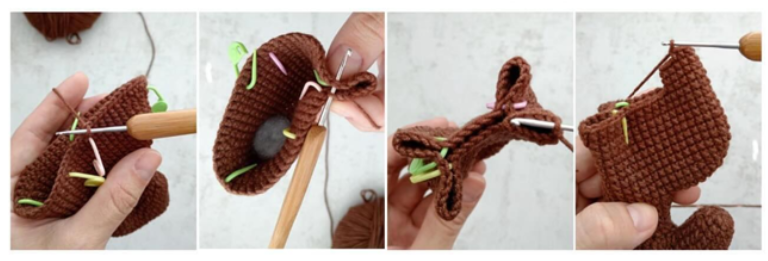
Neck
Crochet the second part of the “eight”. Join the yarn and begin crocheting from the central join; this is where the beginning of the round is counted.
ROUNDS 1-2: crochet 2 rounds of sc without changes (18).
ROUND 3: 17 sc, inc (19).
ROUND 4: crochet sc without changes (19).
ROUND 5: 18 sc, inc (20).
ROUND 6: crochet sc without changes (20).
ROUND 7: 19 sc, inc (21).
Then crochet 8 ch for the back.
The chain can be directed from the place where this part ended, which is the option worked in this pattern, or you can crochet 10 stitches forward so the horse’s muzzle faces the front.
Body
Crochet 8 ch.
ROUND 1: crochet sc along one side of the chain. Insert the hook into the next chain from the stitch that is on the hook. After the chain, move to the neck, crochet around it with sc, and continue crocheting along the second side of the chain (35).
ROUND 2: inc, 32 sc, inc, inc (38).
ROUND 3: inc, 35 sc, inc, inc (41).
ROUND 4: inc, 38 sc, inc, inc (44).
ROUND 5: inc, 41 sc, inc, inc (47).
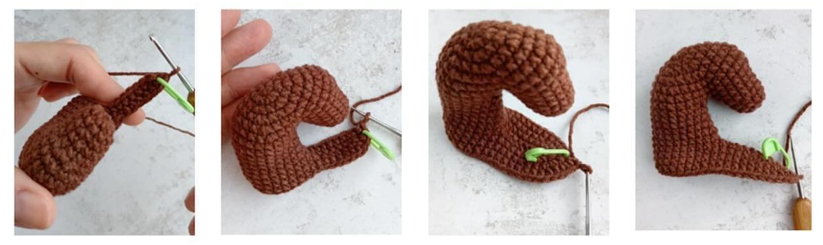
ROUNDS 6-10: crochet 5 rounds of sc without changes (47).
ROUND 11: 19 sc; inc, repeat 6 times; 17 sc; inc, repeat 5 times (58).
ROUND 12: inc, inc, 56 sc (60).
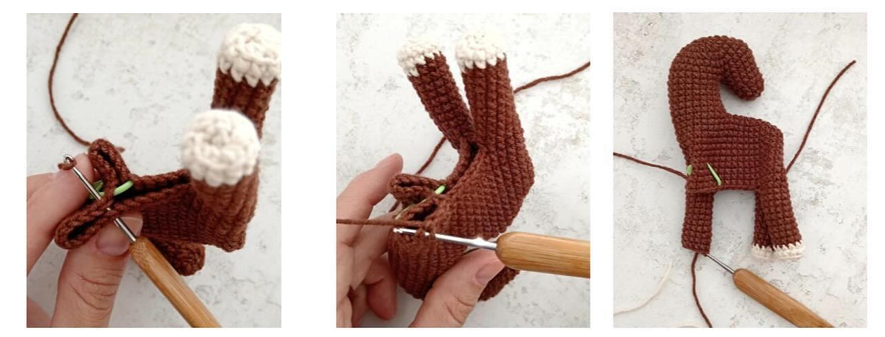
Do not cut the yarn: you will use it to crochet the right hind leg. First, divide the stitches using the center as a reference and place markers. Set aside 12 stitches for each leg, according to the original visual reference.
Legs
After distributing the stitches for the legs, crochet up to the stitch counted as stitch number 12 and join it to the center. Close and crochet the right leg in the round.
Right hind leg
ROUNDS 1-10: crochet 10 rounds of 12 sc (12).
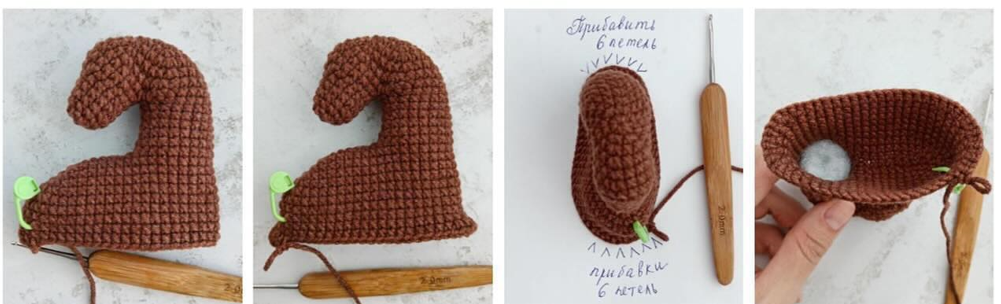
Cut the yarn and change to light beige yarn.
ROUNDS 11-12: crochet 2 rounds of sc without changes (12).
Then decrease all stitches through the back loop.
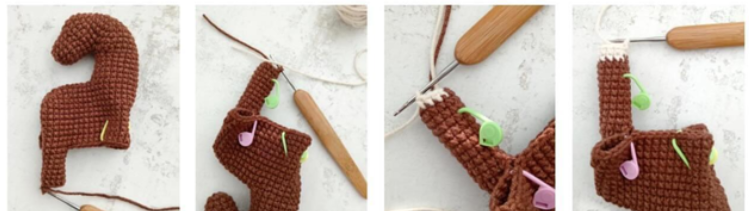
ROUND 13: dec in BLO; repeat 6 times (6).
Cut the yarn, leaving a tail for sewing, close the opening, and hide the yarn tail.
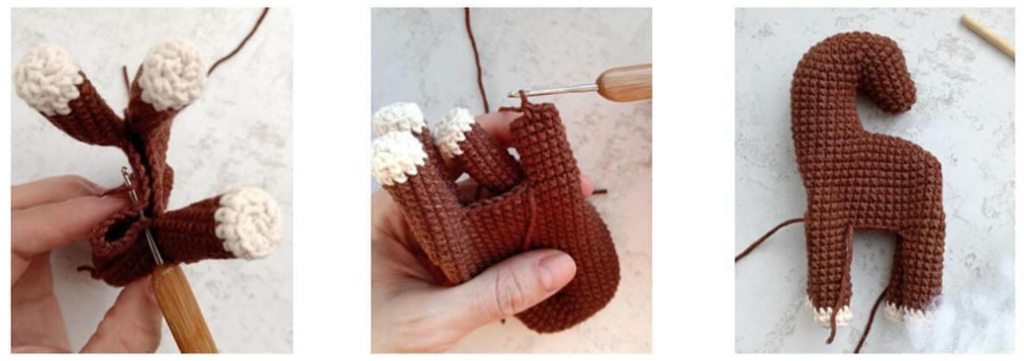
Crochet the other legs in the same way.
Left hind leg
Work the left hind leg following the same sequence as the previous leg.
Right front leg
Work the right front leg following the same sequence as the previous leg.
Left front leg
Work the left front leg following the same sequence as the previous leg.
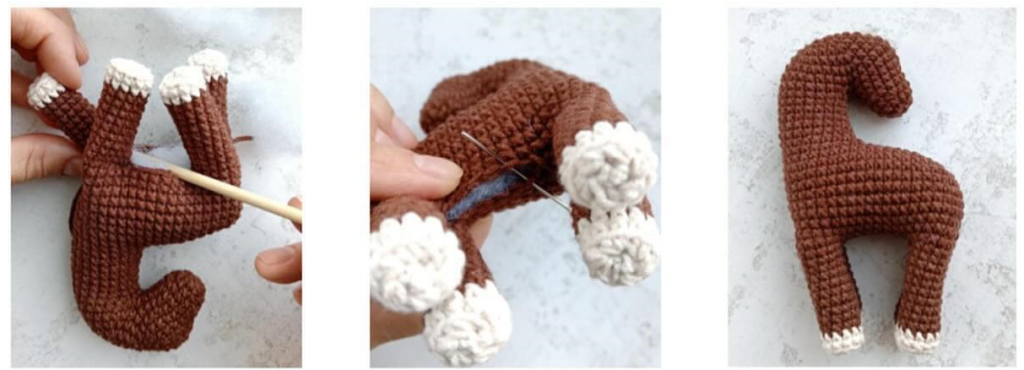
Stuff the body and legs well. Sew the remaining belly opening and hide the leftover yarn tails.
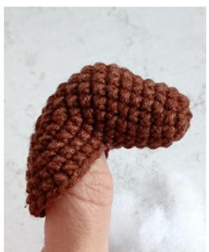
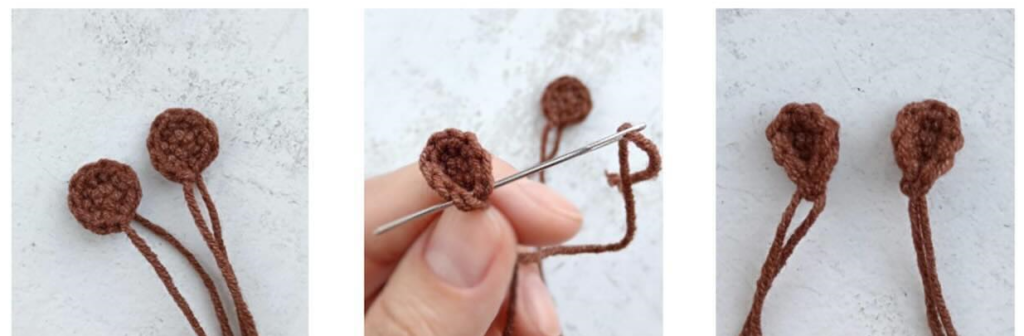
Ears
ROUND 1: 6 sc in MR (6).
ROUND 3: 1 sc, inc; repeat 3 times (9).
Hide the yarn tail from the beginning of the round inside the crochet piece. Fold the ears, press them to shape the base, and sew along the bottom, according to the original visual reference.
Assembly and finishing
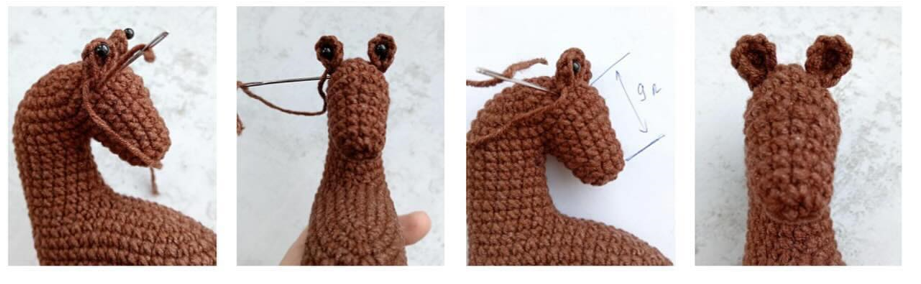
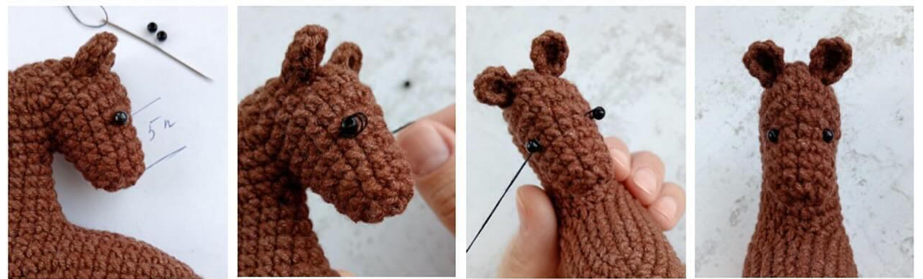
Placing the ears and eyes
Sew on the ears, pinning them first to check the position.
Sew on the bead eyes. The distance between the eyes is approximately 4 stitches. When sewing them on, sink the eyes just a little by gently pulling the thread to give expression to the muzzle.
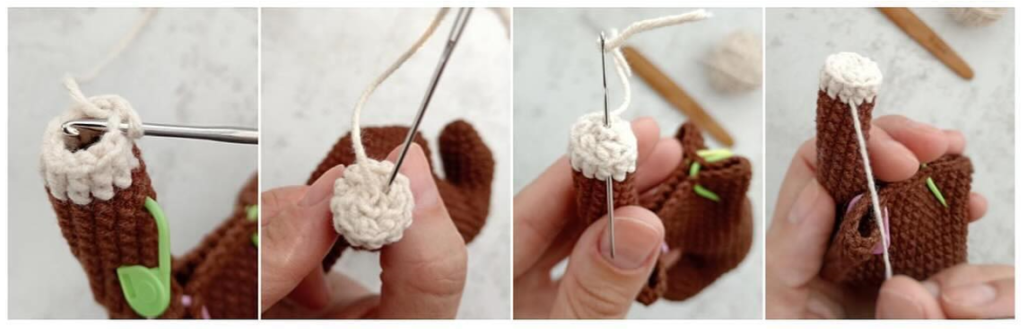
Mane and tail
For the mane, cut strands approximately 15 cm long. For the tail, cut strands approximately 12 cm long.
The number of strands depends on personal preference. In the original pattern, it is not made very thick, because after separating the yarn, the mane and tail become very fluffy.
Tie the tail strands in the center with a longer strand. Use that same strand to sew the tail to the body.
Test the position of the tail and sew it on. If necessary, even out the length a little with scissors.

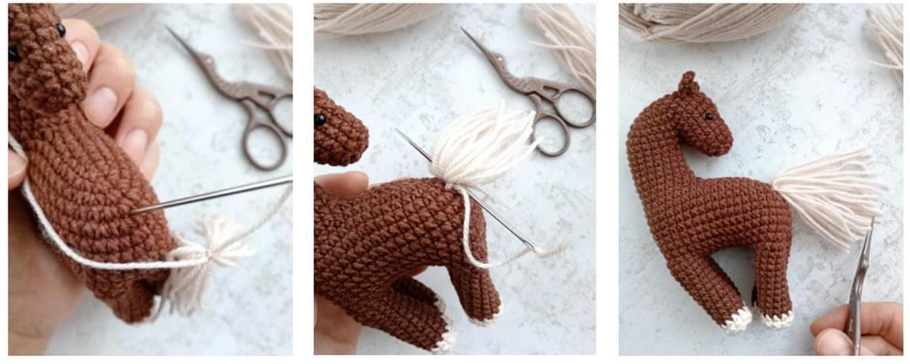
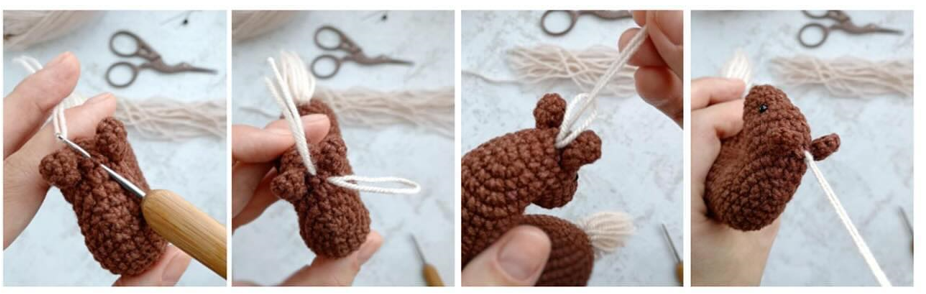
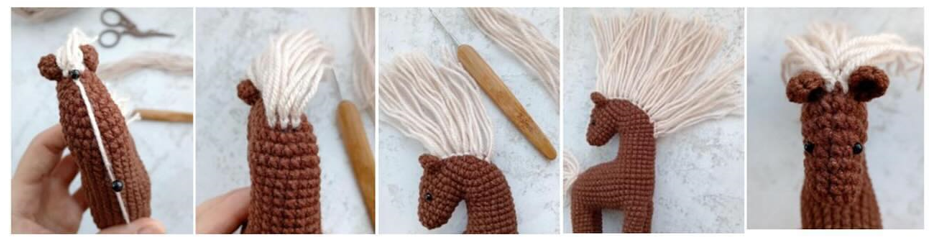
Attach the mane with the crochet hook. To do this, fold each strand in half and pull it through the stitches along the center of the head and neck with the crochet hook. Pass the free ends of the strand through the loop that forms and tighten well.
Three attachment points per row are enough. Start from the ears and finish approximately at the middle of the neck. Check that the mane looks symmetrical and centered.
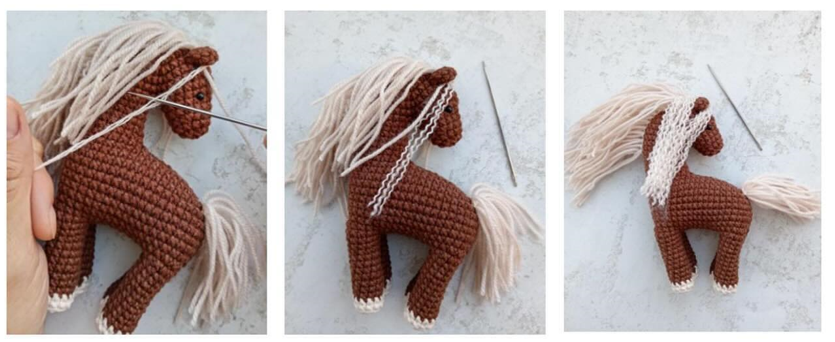
After that, if you have patience, separate each strand of the mane and tail into three thinner strands. To do this, untwist the yarn, help yourself with a needle, and divide the main strand. This creates a wavy, light, and voluminous mane.
Keep in mind that, once separated this way, the strand may break more easily and the toy will need gentle handling.
Gently brush the ends with a slicker brush. The mane and tail will become soft and fluffy, like a cloud.
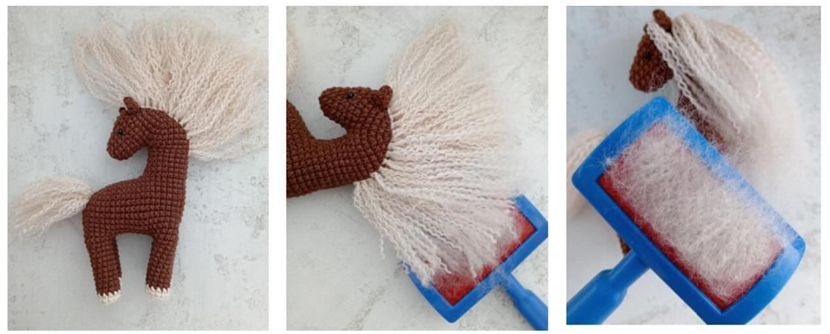
The little horse is ready! Thank you for your attention.
My experience and tips for crocheting this amigurumi
When reviewing and organizing this pattern, the most important thing is to respect the construction shape: first, a base is created and divided into two parts, and from there the muzzle and neck are formed. That is why I recommend marking the beginnings of the rounds very well and not removing the markers until you clearly understand the body’s orientation.
In this pony, symmetry is key. Before sewing on the ears and eyes, it is best to hold them with pins and look at the toy from the front and from the side. A small difference in the height of the beads can change the little horse’s expression a lot.
I would also pay special attention to the stuffing. The neck and legs should be firm, but not hard. If you stuff everything at once, they may become misshapen; it is better to add small portions and arrange them with the handle of the crochet hook or a thin tool.
If the toy will be for a small child, it is better to embroider the eyes instead of using beads. Beads look very pretty, but they are not the safest option for babies or children who may put the toy in their mouth.
The mane and tail are the most eye-catching detail. Separating the strands takes time, but it completely transforms the finish. Do it gently and do not pull the yarn too much, because the original pattern warns that separated yarn may break and requires care.
Frequently asked questions
Can I crochet this pony with a different yarn thickness?
Yes, you can use another yarn, but the final size will change. If you use thicker yarn, the pony will be larger; if you use thinner yarn, it will be smaller. The important thing is to choose a crochet hook that creates a closed fabric so the stuffing does not show through.
What should I do if the legs are not symmetrical?
Before starting each leg, check the distribution of the 12 reserved stitches and the position of the markers. If one leg looks twisted, it is better to undo a few rounds and correct the division before continuing.
How can I wash this amigurumi?
Ideally, wash it by hand with cold water and mild soap. Do not wring it. Remove excess water with a towel and let it air dry. If you separated and brushed the mane, comb it very carefully after drying.
Pattern credits
This pattern belongs to WasilenaToys, by Alena Vasilyeva. You can find more of the author’s work on her Instagram: @wasilenatoys.
Did you crochet it? Leave me a comment or share it on social media using #PatternsAmigurumi so I can see it.
Before you start: useful supplies for this amigurumi
Check yarn, eyes, stuffing, and accessories before crocheting so you do not get stuck halfway through the project.
- Yarn needleEssential for sewing pieces and hiding ends.View options
- Crochet hookThe right size keeps stitches firm and neat.View options
- Stitch markersHelpful for tracking rounds and increases.View options
- PinsUseful for positioning pieces before sewing.View options
- Safety noseA small detail that improves the finish.View options
- Safety eyesAdds a clean, even expression to the doll.View options
Links open Amazon searches related to each material.
Leave a reply