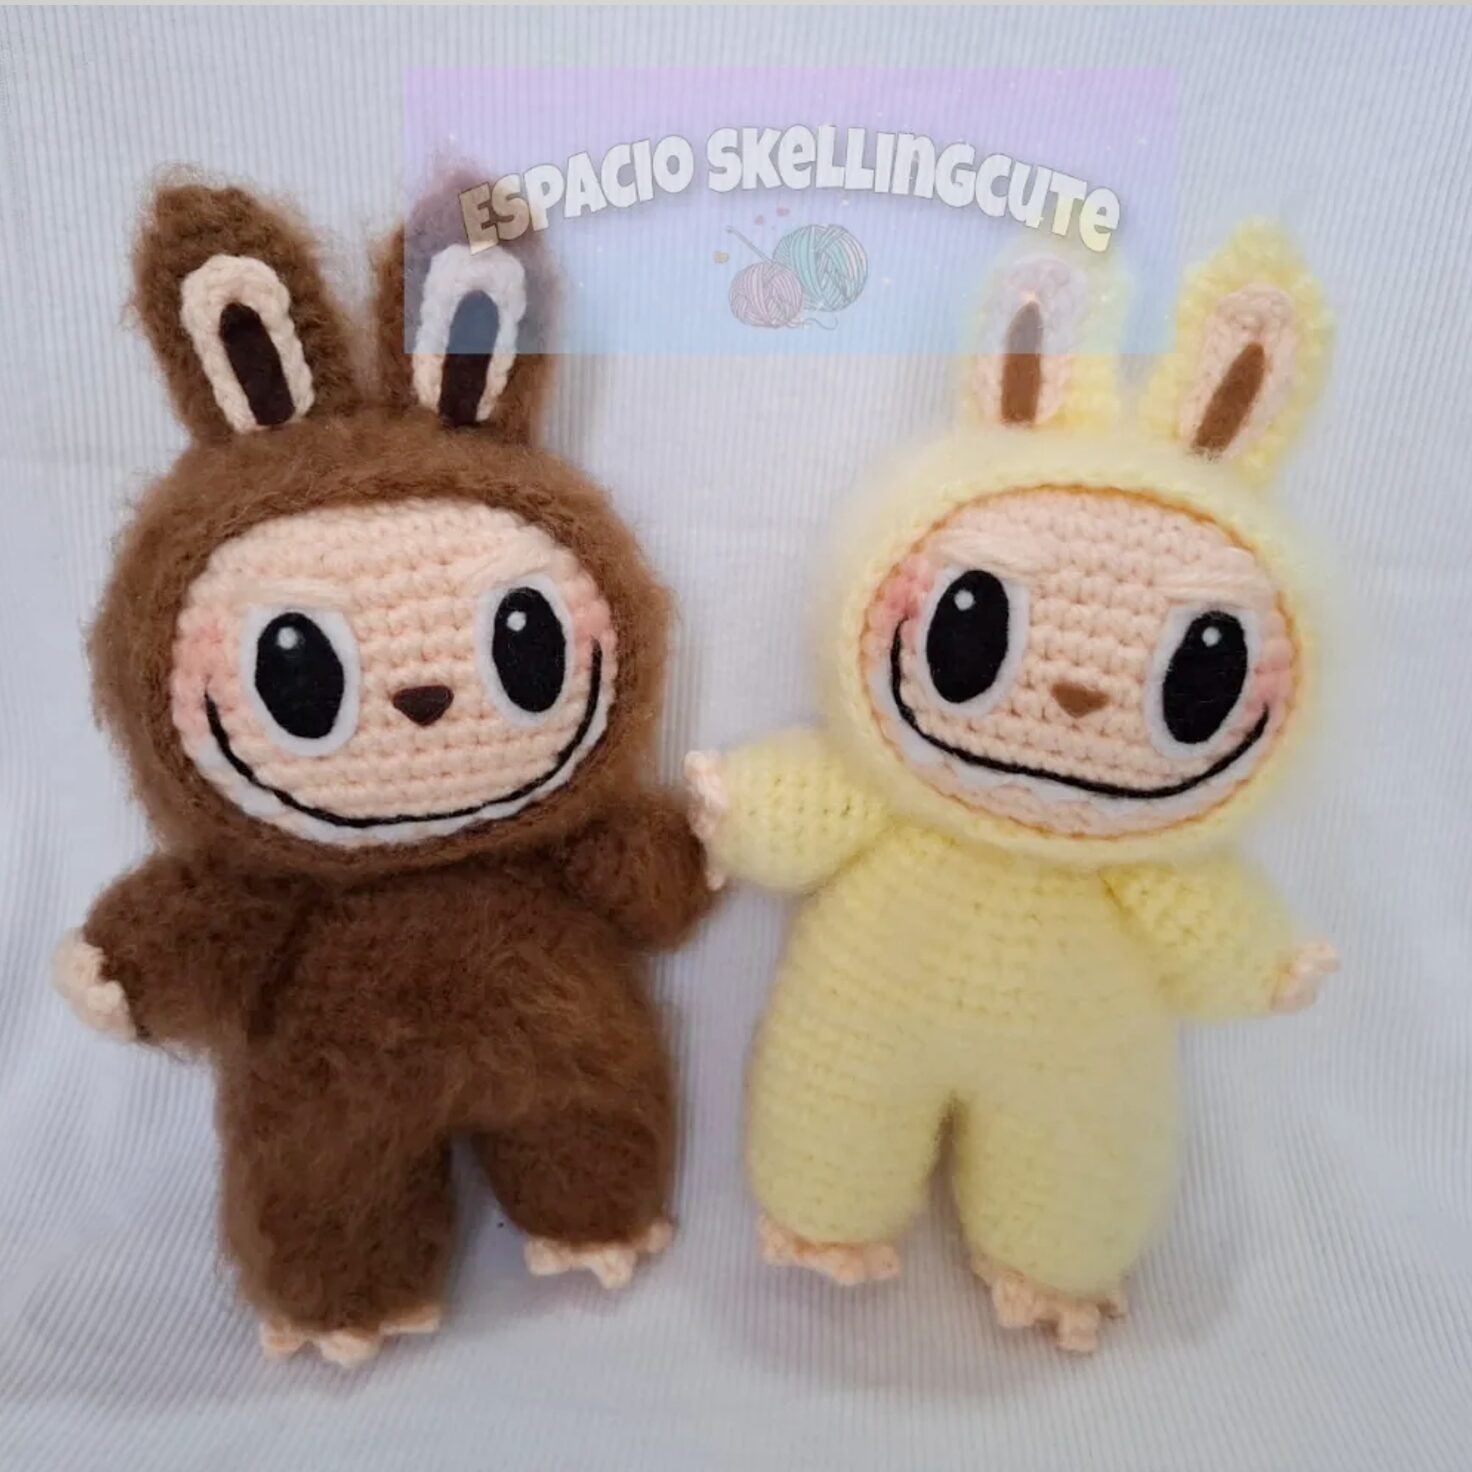
If you like dolls with lots of personality and bold details, this Labubu amigurumi is a beautiful project to crochet with patience. Here you will find the complete free pattern, organized step by step so the pieces, assembly and finishing details are easier to follow.
Labubu became popular for its mischievous look, pointed ears and expressive face. In crochet, it lets you work soft shapes, strong facial details and a decorative furry finish for fans of modern characters.
Original design credit: Espacio Skellingcute. Please support the creator and respect the original work.
Materials
- Acrylic yarn in the main color, for example pastel yellow for the body.
Advertisement / affiliate link. As an Amazon Associate, I earn from qualifying purchases.
- Skin-tone yarn for the head, hands and feet.
- Optional yarn colors for extra details.
- 3.5 mm crochet hook.
- Yarn needle.
- Fiberfill stuffing for amigurumi.
- Wire-bristle brush for the furry effect.
- White, black and brown felt for eyes, nose and details.
- Textile glue or cold silicone.
- Scissors and stitch marker.
Before you start: useful supplies for this amigurumi
Check yarn, eyes, stuffing, and accessories before crocheting so you do not get stuck halfway through the project.
- Cotton yarnPick similar colors before you start.View options
- Yarn needleEssential for sewing pieces and hiding ends.View options
- Crochet hookThe right size keeps stitches firm and neat.View options
- PinsUseful for positioning pieces before sewing.View options
- Safety noseA small detail that improves the finish.View options
- Safety eyesAdds a clean, even expression to the doll.View options
Links open Amazon searches related to each material.
If you are unsure about yarns or tools, see the amigurumi materials guide.
Abbreviations
- Rnd: round
- ch: chain
- MR: magic ring
- sc: single crochet
- hdc: half double crochet
- sl st: slip stitch
- inc: increase
- dec: decrease
- BLO: back loop only
- FLO: front loop only
You can review the basic terms in the crochet abbreviations guide for amigurumi.
Labubu amigurumi pattern
Feet, make 2
Rnd 1: MR with 6 sc, close with sl st. [6]
Rnd 2: inc in each stitch. [12]
Rnd 3: (1 sc, inc) around. [18]
Rnd 4: 1 sc in BLO of each stitch. [18]
Rnd 5-6: 1 sc in each stitch. [18]
Rnd 7: (5 sc, inc) around. [21]
Rnd 8-9: 1 sc in each stitch. [21]
Fasten off the first foot and leave a tail for sewing. Make the second foot the same way, but do not cut the yarn at the end because it will be joined to the body.
Body
Join both feet by crocheting 21 sc around each one. [42]
Rnd 2-6: 1 sc in each stitch. [42]
Rnd 7: (4 sc, dec) around. [35]
Rnd 8: 1 sc in each stitch. [35]
Rnd 9: (3 sc, dec) around. [28]
Rnd 10-11: 1 sc in each stitch. [28]
Rnd 12: (2 sc, dec) around. [21]
Rnd 13: 1 sc in each stitch, close with sl st and leave a long tail to sew the head. [21]
Head, skin tone
Rnd 1: MR with 6 sc. [6]
Rnd 2: inc in each stitch. [12]
Rnd 3: (1 sc, inc) around. [18]
Rnd 4: (2 sc, inc) around. [24]
Rnd 5: (3 sc, inc) around. [30]
Rnd 6: (4 sc, inc) around. [36]
Rnd 7: (5 sc, inc) around. [42]
Rnd 8: (6 sc, inc) around. [48]
Rnd 9-15: 1 sc in each stitch. [48]
Rnd 16: (6 sc, dec) around. [42]
Rnd 17: (5 sc, dec) around. [36]
Rnd 18: (4 sc, dec) around. [30]
Rnd 19: (3 sc, dec) around. [24]
Rnd 20: (2 sc, dec) around. [18]
Rnd 21: (1 sc, dec) around. [12]
Rnd 22: 6 dec, close with sl st and leave a tail for sewing. [6]
Hood, main color
Rnd 1: MR with 6 sc. [6]
Rnd 2: inc in each stitch. [12]
Rnd 3: (1 sc, inc) around. [18]
Rnd 4: (2 sc, inc) around. [24]
Rnd 5: (3 sc, inc) around. [30]
Rnd 6: (4 sc, inc) around. [36]
Rnd 7: (5 sc, inc) around. [42]
Rnd 8: (6 sc, inc) around. [48]
Rnd 9: (7 sc, inc) around. [54]
Rnd 10-13: 1 sc in each stitch. [54]
Rnd 14: (7 sc, dec) around. [48]
Rnd 15-18: 1 sc in each stitch. [48]
Rnd 19: (6 sc, dec) around. [42]
Close with sl st and leave a tail to attach the hood to the head. Brush the main-color yarn to create the furry texture.
Arms, make 2
Rnd 1: MR with 6 sc. [6]
Rnd 2: inc in each stitch. [12]
Rnd 3: 1 sc in BLO of each stitch. [12]
Rnd 4: (1 sc, inc) around. [18]
Rnd 5-6: 1 sc in each stitch. [18]
Rnd 7: (1 sc, dec) around. [12]
Rnd 8-9: 1 sc in each stitch. [12]
Rnd 10: 6 dec, close with sl st and leave a tail for sewing.
Hands and paws
For each hand, chain 3 and crochet 1 sc in each chain for 3 sc total. Join with sl st and repeat to form three fingers. Leave a tail to sew the hands to the arms.
For each paw, work MR with 6 sc, then inc in each stitch for 12 sc. Finish by forming three toes as you did for the hands, then sew the paws to the feet.
Ears, make 2
Rnd 1: MR with 6 sc. [6]
Rnd 2: 1 sc in each stitch. [6]
Rnd 3: inc in each stitch. [12]
Rnd 4-9: 1 sc in each stitch. [12]
Close with sl st and leave a tail for sewing.
Inner ear
Chain 5. Starting in the second chain from the hook, crochet 1 sc in each of the next 4 chains. In the last chain, crochet 3 sc in the same stitch to round the tip. Work 1 sc in each of the 3 stitches along the other side of the chain, then 1 more sc in the last stitch. Join with sl st to the first sc and leave a tail for sewing.
Face details and finishing
- Eyes: glue a white felt oval with a diagonal cut and a smaller black oval on top. Add tiny white dots for shine.
- Nose: cut a small brown felt triangle.
- Mouth: embroider a black U shape.
- Teeth: glue small white felt triangles.
- Eyelids: embroider with skin-tone thread above the eyes.
- Blush: apply a little pink blush to the cheeks.
Brush the body and ears with the wire-bristle brush for the furry effect. Sew all pieces securely and use textile glue only where needed.
Video tutorial and credit
Video tutorial: https://www.youtube.com/watch?v=1JYFdn4ImEY
This tutorial was created by Espacio Skellingcute and is shared here for creative and educational purposes. Please support the creator, subscribe to her channel and credit the original design when sharing your finished doll.
Crochet tips from experience
When crocheting characters with pointed ears and expressive faces, I like to place every detail with pins before sewing. Step back and look at the face from a distance: the symmetry of the eyes, mouth and ears changes the whole expression.
Frequently asked questions
Is this Labubu pattern suitable for beginners?
It depends on your experience. The pattern has several pieces and facial details, so it is best to read everything first, mark each round and work slowly.
Can I change the colors?
Yes. You can adapt the colors and details to your taste. If you want the character to stay recognizable, keep the main color palette and the pointed ears.
How do I get a cleaner finish?
Stuff little by little, sew patiently and place each piece with pins before fixing it. This helps prevent eyes, ears and details from ending up crooked.
If you crochet it, share your result with the hashtag #PatternsAmigurumi.
Notice: This pattern is an original design by Espacio Skellingcute and is shared here for educational and creative purposes. All credit belongs to the creator.

Leave a reply