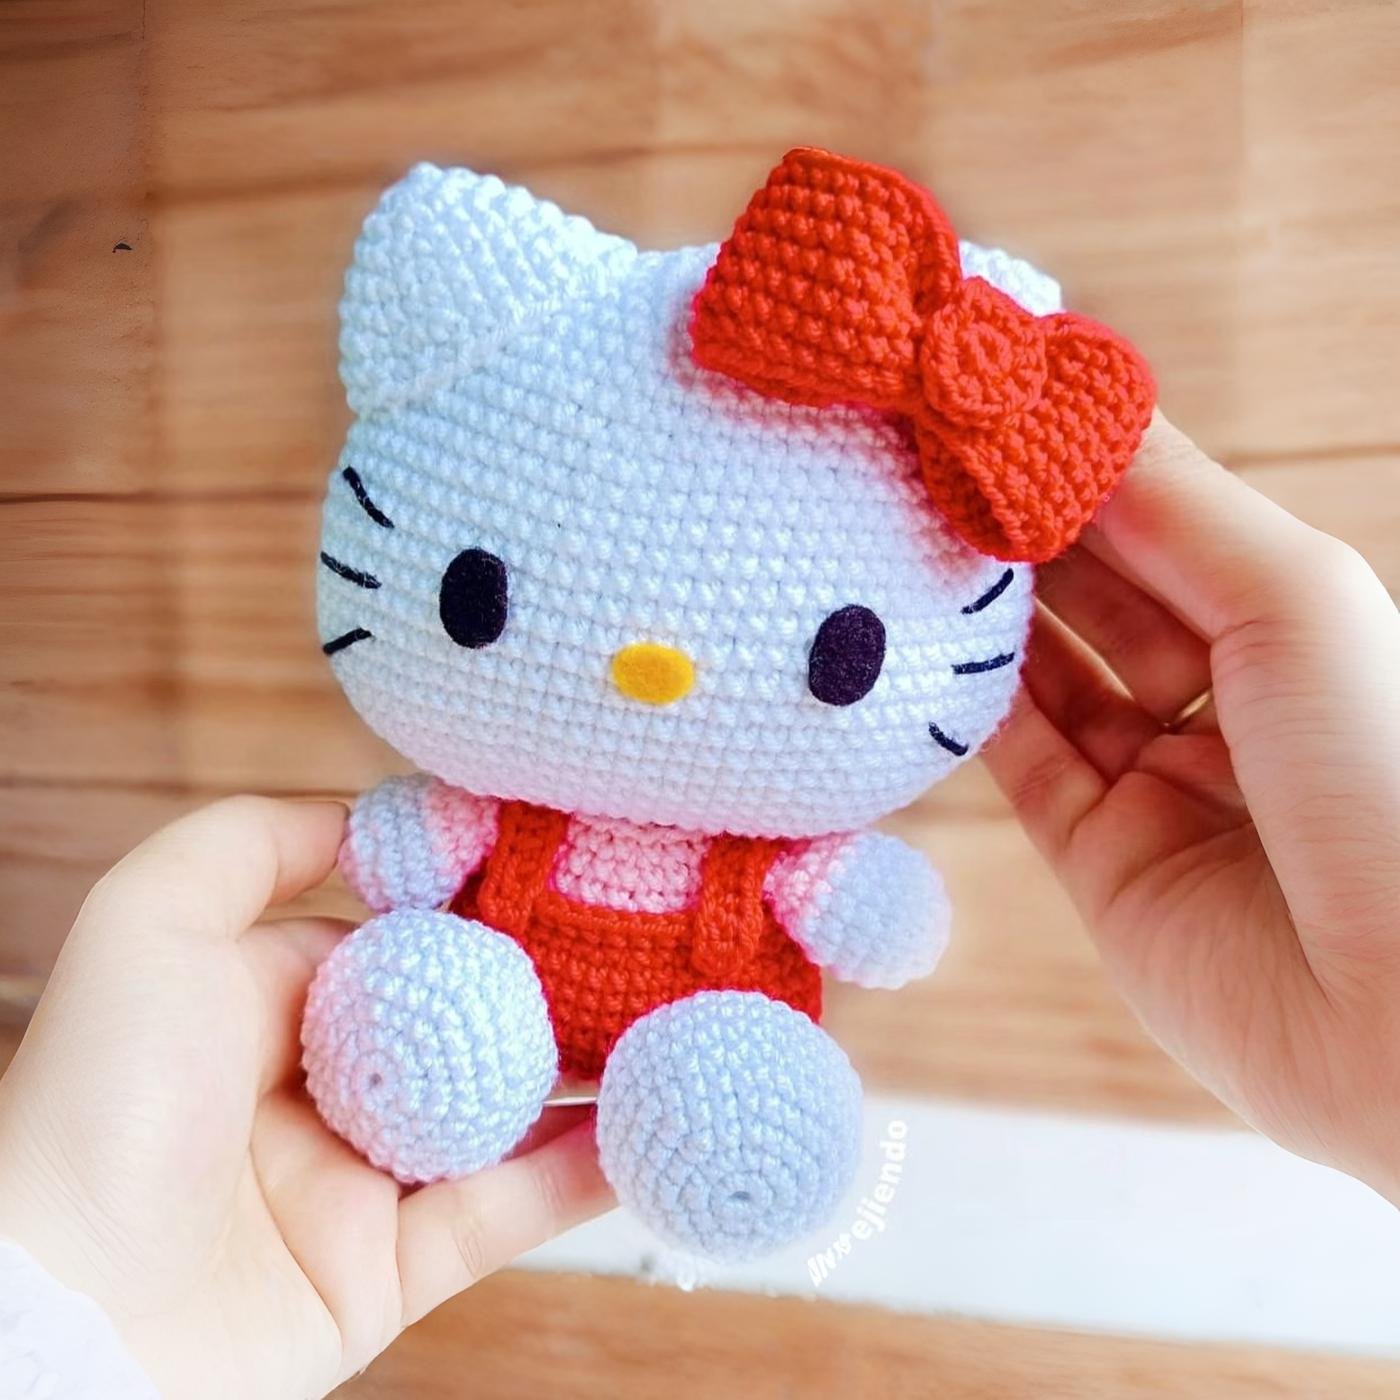
This free Hello Kitty amigurumi pattern is a sweet crochet project for anyone who loves classic characters and handmade dolls. The instructions include the head, ears, body, arms, straps, legs, tail and bow, with the original video and credits preserved.
Original design and tutorial by Amis Tejiendo Momentos. Follow the creator on Instagram, Facebook, YouTube and Ravelry.
Materials
- 2.0 mmcrochet hook.
Advertisement / affiliate link. As an Amazon Associate, I earn from qualifying purchases.
- 2 mm yarn in white, red, pink and black.
- Yarn needle.
- Black and yellow felt.
- Fiberfill stuffing.
- Liquid silicone glue.
- Scissors, stitch marker and pins.
Abbreviations
- Rnd: Round
- ch: Chain
- MR: Magic ring
- sc: Single crochet
- hdc: Half double crochet
- inc: Increase
- dec: Decrease
- sl st: Slip stitch
- BLO: Back loop only
- FLO: Front loop only
Pattern
Head, white yarn
Round 1: Start with 14 ch.
Round 2: From the second ch: 1 inc, 11 sc, 1 inc.
Round 3: On the other side of the chain: 1 inc, 11 sc, 1 inc (30 sc total).
Round 4: 2 inc, 11 sc, 4 inc, 11 sc, 2 inc (38 sc)
Round 5: 2 sc, 1 inc, 13 sc, 1 inc, 2 sc, 2 sc, 1 inc, 13 sc, 1 inc, 2 sc (42 sc)
Round 6: (6 sc, 1 inc) x6 (48 sc)
Round 7: 2 inc, 20 sc, 3 inc, 22 sc, 1 inc (54 sc)
Round 8: (8 sc, 1 inc) x6 (60 sc)
Round 9: 2 inc, 26 sc, 3 inc, 28 sc, 1 inc (66 sc)
Round 10: (10 sc, 1 inc) x6 (72 sc)
Rounds 11-20: 72 sc
Round 21: (10 sc, 1 dec) x6 (66 sc)
Round 22: 2 dec, 28 sc, 3 dec, 26 sc, 1 dec (60 sc)
Round 23: (8 sc, 1 dec) x6 (54 sc)
Round 24: 2 dec, 22 sc, 3 dec, 20 sc, 1 dec (48 sc)
Round 25: 48 sc
Round 26: (6 sc, 1 dec) x6 (42 sc)
Round 27: (5 sc, 1 dec) x6 (36 sc)
Round 28: (4 sc, 1 dec) x6 (30 sc)
Round 29: (3 sc, 1 dec) x6 (24 sc)
Round 30: (2 sc, 1 dec) x6 (18 sc)
Round 31: (1 sc, 1 dec) x6 (12 sc)
Round 32: 6 dec
Ears, make 2
Round 1: MR, 6 sc
Round 2: 6 inc (12 sc)
Round 3: 1 sc, 1 inc (18 sc)
Round 4: (5 sc, 1 inc) x3 (21 sc)
Round 5: (6 sc, 1 inc) x3 (24 sc)
Round 6: (5 sc, 1 inc) x4 (28 sc)
Round 7: (1 inc, 13 sc) x2 (30 sc)
Body
Round 1: 14 ch
Round 2: From the second ch: 1 inc, 11 sc, 1 inc.
Round 3: On the other side of the chain: 1 inc, 11 sc, 1 inc.
Round 4: 2 inc, 11 sc, 4 inc, 11 sc, 2 inc (38 sc)
Round 5: 2 inc, 17 sc, 2 inc, 17 sc (42 sc)
Rounds 6-11: 42 sc
Round 12: (5 sc, 1 dec) x6 (36 sc)
Round 13: BLO: (4 sc, 1 dec) x6 (30 sc)
Round 14: (3 sc, 1 dec) x6 (24 sc)
Round 15: 24 sc
Round 16: (4 sc, 1 dec) x4 (20 sc)
Arms, make 2
Round 1: MR, 6 sc
Round 2: 6 inc (12 sc)
Round 3: (1 sc, 1 inc) x6 (18 sc)
Rounds 4-5: 18 sc
Round 6: (4 sc, 1 dec) x3 (15 sc)
Round 7: (3 sc, 1 dec) x3 (12 sc)
Round 8: (1 sc, 1 dec) x4 (8 sc)
Round 9: Fold in half and close by crocheting 4 sc.
Straps, make 2
Round 1: 17 ch
Round 2: From the 3rd ch: 15 hdc.
Legs, make 2
Round 1: MR, 6 sc
Round 2: 6 inc (12 sc)
Round 3: 1 sc, 1 inc (18 sc)
Round 4: (2 sc, 1 inc) x6 (24)
Round 5: (3 sc, 1 inc) x6 (30 sc)
Rounds 6-9: 30 sc
Round 10: (3 sc, 1 dec) x6 (24 sc)
Round 11: (2 sc, 1 dec) x6 (18 sc)
Round 12: (1 sc, 1 dec) x6 (12 sc)
Tail
Round 1: MR, 6 sc
Round 2: 6 inc (12 sc)
Round 3: 1 sc, 1 inc (18 sc)
Rounds 4-6: 18 sc
Round 7: 1 sc, 1 dec (12 sc)
Round 8: 1 sc, 1 dec (8 sc)
Bow
Round 1: 38 ch, join the ends with sl st and work in a spiral.
Round 2: 1 ch, 38 sc, close over the first stitch of the previous round with sc.
Round 3: 1 ch, 38 sc.
Round center 1: MR, 6 sc
Round center 2: 6 inc (12)
Video tutorial
Crochet tips
Before sewing the pieces, pin them in place and check the balance of the head, bow and straps. Firm stuffing helps the oval head keep its shape.
Special thanks to Amis Tejiendo Momentos for creating and sharing this Hello Kitty design with the crochet community.
Frequently asked questions
Is this Hello Kitty pattern beginner-friendly?
It is easier if you already know basic amigurumi stitches, increases, decreases and sewing. The rounds are detailed, but the head and finishing require patience.
What material is used for the eyes and nose?
The original pattern uses black and yellow felt for some facial details, plus yarn and glue for finishing.
Should I sew or glue the bow and straps?
Sewing gives a stronger finish, while liquid silicone can help secure felt or small decorative details.
How do I keep the head in shape?
Stuff the head firmly and evenly, especially before closing the last rounds.
Where are the eyes and nose placed?
Place them according to the face shape after the head is stuffed, using pins first to check the expression.
Before you start: useful supplies for this amigurumi
Check yarn, eyes, stuffing, and accessories before crocheting so you do not get stuck halfway through the project.
- Yarn needleEssential for sewing pieces and hiding ends.View options
- Crochet hookThe right size keeps stitches firm and neat.View options
- PinsUseful for positioning pieces before sewing.View options
- Safety noseA small detail that improves the finish.View options
- Safety eyesAdds a clean, even expression to the doll.View options
- amigurumi eyesA practical way to gather supplies quickly.View options
Links open Amazon searches related to each material.

Leave a reply