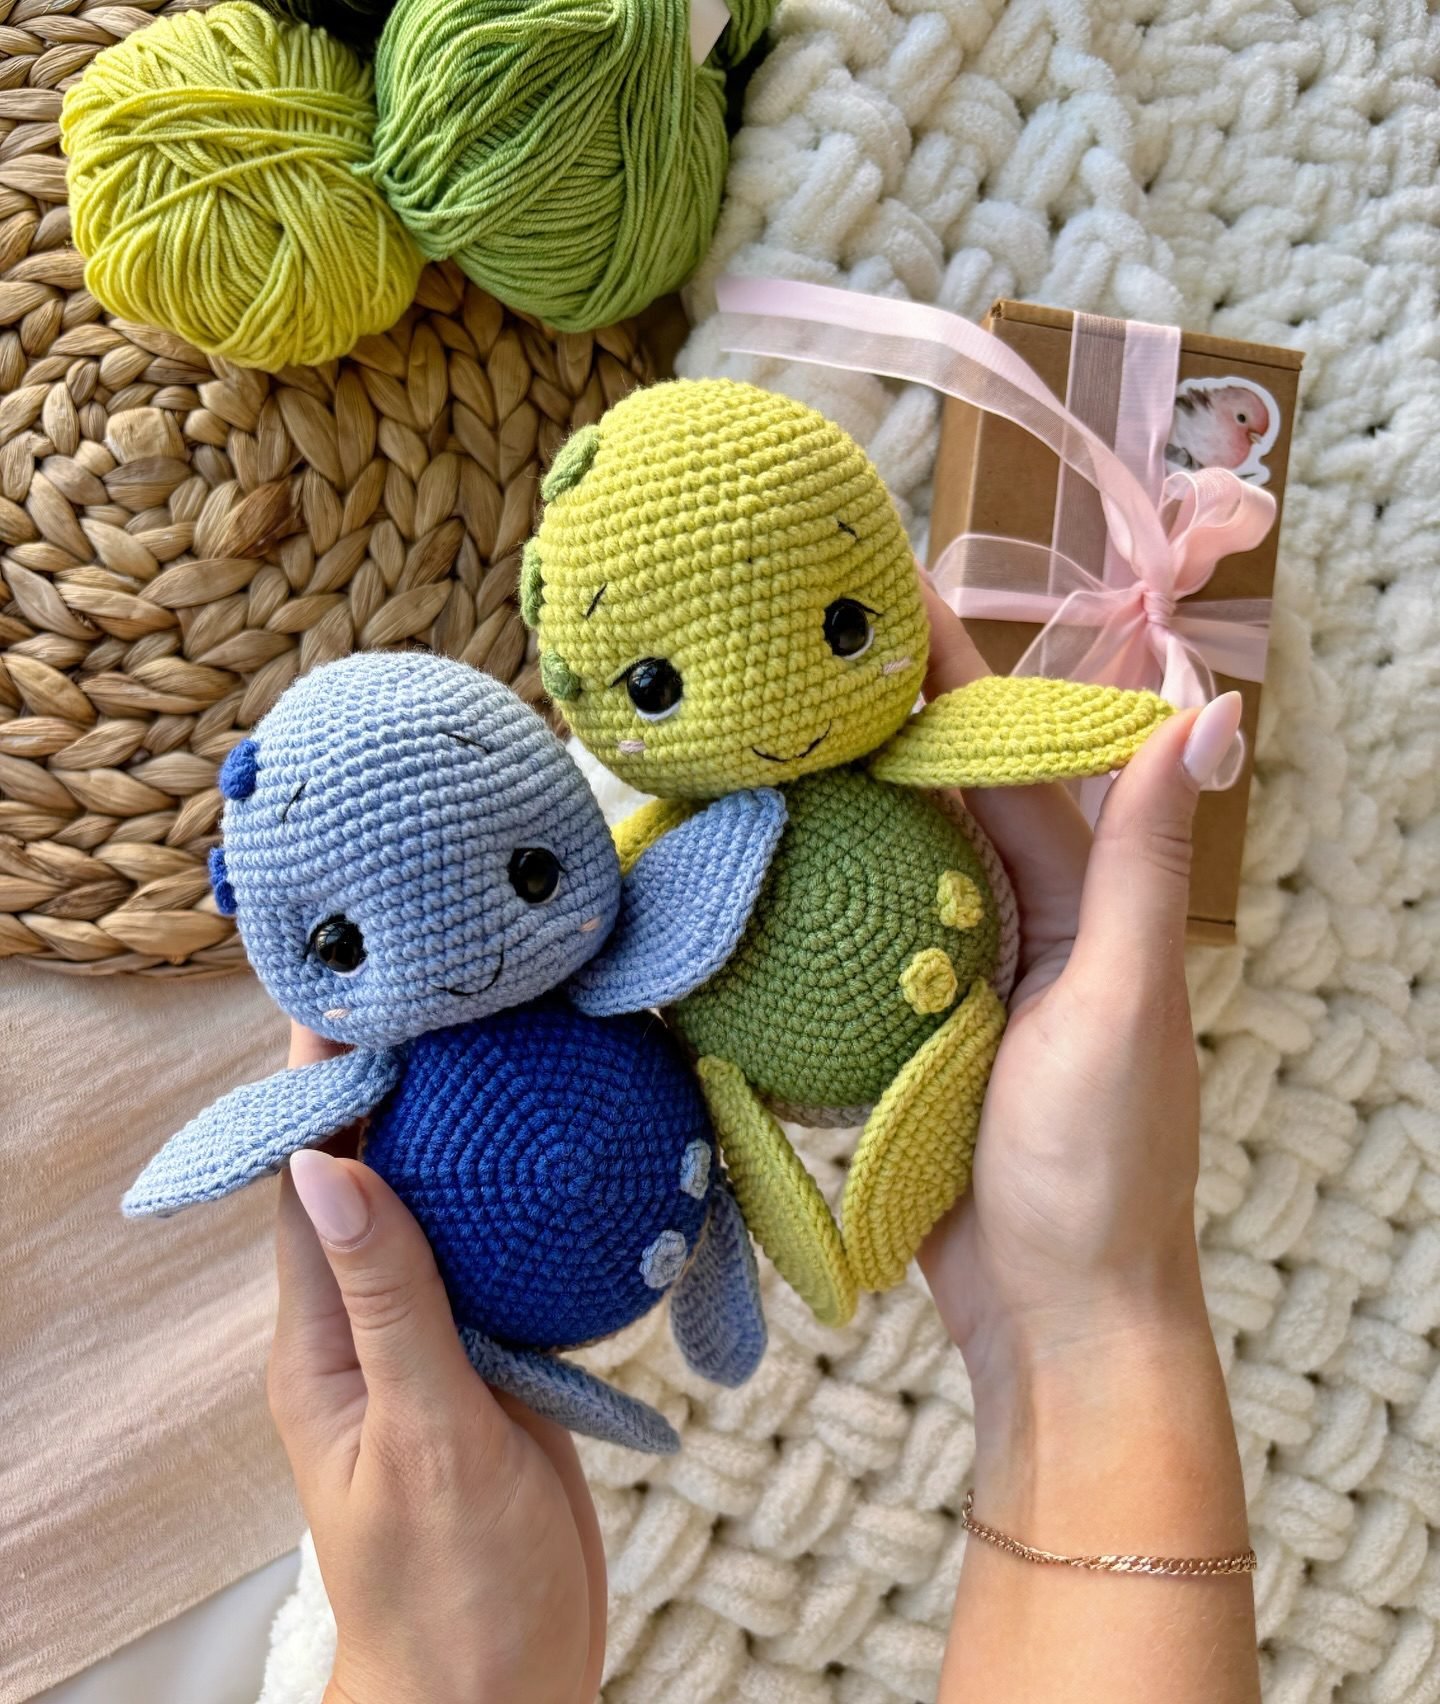
If you are looking for a sweet and relaxing project, this turtle amigurumi pattern is perfect for you. Creating a crocheted doll with your own hands is not only an art, but also a way to give love in every stitch. This amigurumi toy is ideal for decorating children’s rooms or as a special handmade gift.
In this guide you will follow the process step by step so you can achieve a polished result, even if you are just starting in crochet.
Turtles are iconic characters in popular culture, from the wise turtle in Aesop’s fables to friendly sea characters in movies such as Finding Nemo, including Crush and Squirt. They represent perseverance, longevity and peace, making them one of the most meaningful designs for crocheters around the world.
This is a free pattern by @uzelochki_toys_. Please follow her on social media and tag the author when you publish your finished pieces.
Required Materials
- Cotton yarn in the desired colors: green for the shell and cream or brown for the body.
Advertisement / affiliate link. As an Amazon Associate, I earn from qualifying purchases.
- Crochet hook suitable for your yarn thickness.
- Safety eyes.
- Synthetic stuffing.
- Yarn needle and scissors.
Before you start: useful supplies for this amigurumi
Check yarn, eyes, stuffing, and accessories before crocheting so you do not get stuck halfway through the project.
- Safety eyesAdds a clean, even expression to the doll.View options
- Cotton yarnPick similar colors before you start.View options
- Yarn needleEssential for sewing pieces and hiding ends.View options
- Crochet hookThe right size keeps stitches firm and neat.View options
- Safety noseA small detail that improves the finish.View options
- amigurumi eyesA practical way to gather supplies quickly.View options
Links open Amazon searches related to each material.
If you have questions about yarns or tools, see our complete amigurumi materials guide.
Abbreviations Used
- V: Round
- Cad: Chain
- Am: Magic ring
- Pb: Single crochet
- Pm: Half stitch
- Pd: Slip stitch
- Pa: Double crochet
- Pma: Half double crochet
- Aum: Increase
- Dis: Decrease
- BLO: back loop only
- FLO: front loop only
You can review all the techniques in our crochet abbreviations guide for amigurumi.
Pattern Instructions
Legs: 4 pieces
ROUND 1: 6 pb in AM (6)
ROUND 2: 6 aum (12)
ROUND 3: (1 pb, aum) x 6 (18)
ROUND 4: (2 pb, aum) x 6 (24)
ROUND 5: (3 pb, aum) x 6 (30)
ROUND 6: 2 pb, aum (4 pb, aum) x 5, 2 pb (36)
ROUND 7: (5 pb, aum) x 6 (42)
ROUND 8: 3 pb, aum, (6 pb, aum) x 5, 3 pb (48)
Make a chain, fold the piece in half and crochet through both sides to close it. Close with pd and leave a long tail for sewing.
Head
ROUND 1: 6 pb in AM (6)
ROUND 2: 6 aum (12)
ROUND 3: (1 pb, aum) x 6 (18)
ROUND 4: (2 pb, aum) x 6 (24)
ROUND 5: (3 pb, aum) x 6 (30)
ROUND 6: 2 pb, aum (4 pb, aum) x 5, 2 pb (36)
ROUND 7: (5 pb, aum) x 6 (42)
ROUND 8: 3 pb, aum, (6 pb, aum) x 5, 3 pb (48)
ROUND 9: (7 pb, aum) × 6 (54)
ROUNDS 10-18: 60 pb (60)
Insert the safety eyes between rounds 13 and 14, with 7 pb between them.
ROUND 19: (7 pb, dis) x 6 (48)
ROUND 20: (6 pb, dis) x 6 (42)
ROUND 21: (5 pb, dis) x 6 (36)
ROUND 22: (4 pb, dis) x 6 (30)
ROUND 23: (3 pb, dis) x 6 (24)
ROUND 24: (2 pb, dis) x 6 (18)
ROUND 25: (1 pb, dis) x 6 (12)
ROUND 26: 6 dis (6)
Close with an inverted magic ring, tighten, cut and hide the remaining yarn.
Torso
The turtle body has two different parts:
Belly
ROUND 1: 6 pb in AM (6)
ROUND 2: 6 aum (12)
ROUND 3: (1 pb, aum) x 6 (18)
ROUND 4: (2 pb, aum) x 6 (24)
ROUND 5: (3 pb, aum) x 6 (30)
ROUND 6: 2 pb, aum (4 pb, aum) x 5, 2 pb (36)
ROUND 7: (5 pb, aum) x 6 (42)
ROUND 8: 3 pb, aum, (6 pb, aum) x 5, 3 pb (48)
ROUND 9: (7 pb, aum) x 6 (54)
ROUNDS 10-12: 54 pb (3 rounds)
Shell
ROUND 1: 6 pb in AM (6)
ROUND 2: 6 aum (12)
ROUND 3: (1 pb, aum) x 6 (18)
ROUND 4: (2 pb, aum) x 6 (24)
ROUND 5: (3 pb, aum) x 6 (30)
ROUND 6: 2 pb, aum (4 pb, aum) x 5, 2 pb (36)
ROUND 7: (5 pb, aum) x 6 (42)
ROUND 8: 3 pb, aum, (6 pb, aum) x 5, 3 pb (48)
ROUND 9: (7 pb, aum) x 6 (54)
ROUNDS 10-14: 54 pb (5 rounds)
After round 14 of the shell, do not cut the yarn. Join the two parts, shell and belly, with the wrong sides facing each other, and crochet 54 pb through both pieces. Before closing completely, stuff the body well. Remember that the stuffing should be concentrated in the shell area so the belly stays flat. Cut the yarn and hide it.
Spots: make as many as you want
On all parts of the turtle, the spots are made the same way:
ROUND 1: 8 pb in AM, close with 1 pd.
Cut the yarn, leaving a long tail for sewing.
Assembly and Final Details
Sew the head firmly to the body.
Embroider the facial details: eyelids, eyebrows and eyelashes to give expression.
Sew the spots, distributing them on the head and shell as you like.
Embroider the nose between rounds 15 and 16.
Sew the legs symmetrically on the lower part of the body.
With this free pattern, you will not only learn how to make a turtle, you will also enjoy the creative process. Gather your materials and get to work: your turtle amigurumi is waiting.
Expert Tips for Your Turtle Amigurumi
Based on my experience crocheting this kind of sea animal, I suggest paying special attention to the tension when joining the belly to the shell. If you crochet too tightly there, the edge may ripple. For a truly sweet expression, embroider the eyelids slightly slanted downward; it gives the turtle a serene look. For the stuffing, use a stick or tweezers to push the fiber toward the shell edges before closing, so it keeps a perfect rounded shape.
Did you crochet it? Leave a comment or share it on social media using #PatternsAmigurumi so I can see it.
We deeply thank @uzelochki_toys_ for designing this charming model and helping the crochet community keep growing through her designs.
Notice: This pattern is an original design by @uzelochki_toys_ and is shared here as a translation for educational and reference purposes only. All credit belongs to the creator.
Frequently Asked Questions about the Turtle Amigurumi
What materials are needed to crochet the turtle amigurumi?
For this project you will need cotton yarn, usually green for the shell and cream or brown for the rest of the body, a crochet hook suited to your yarn, safety eyes, synthetic stuffing, a yarn needle for sewing and scissors.
How do I make the shell keep its rounded shape?
The secret is in the stuffing. Concentrate the synthetic stuffing in the upper shell area just before fully closing the join with the belly. Use tweezers or a wooden stick to push the fiber toward the curved edges, making sure the belly stays flat and the shell keeps its rounded volume.
What is the best way to join the shell and belly?
Place both pieces together with the wrong sides facing each other so the right sides face outward. Then crochet 54 single crochet stitches through both pieces at the same time. Keep an even tension and avoid crocheting too tightly so the edge does not ripple.
Is this project suitable for beginner crocheters?
Absolutely. It is an excellent design for people starting in crochet. The turtle structure is based on simple shapes using basic stitches such as the magic ring, single crochet, increases and decreases.
Can I change the final size of the turtle?
Yes. The final size depends directly on the material you choose. If you use thicker yarn, such as chenille or velvet yarn, with a larger hook, you will get a bigger and cuddlier turtle while following exactly the same pattern.

Leave a reply