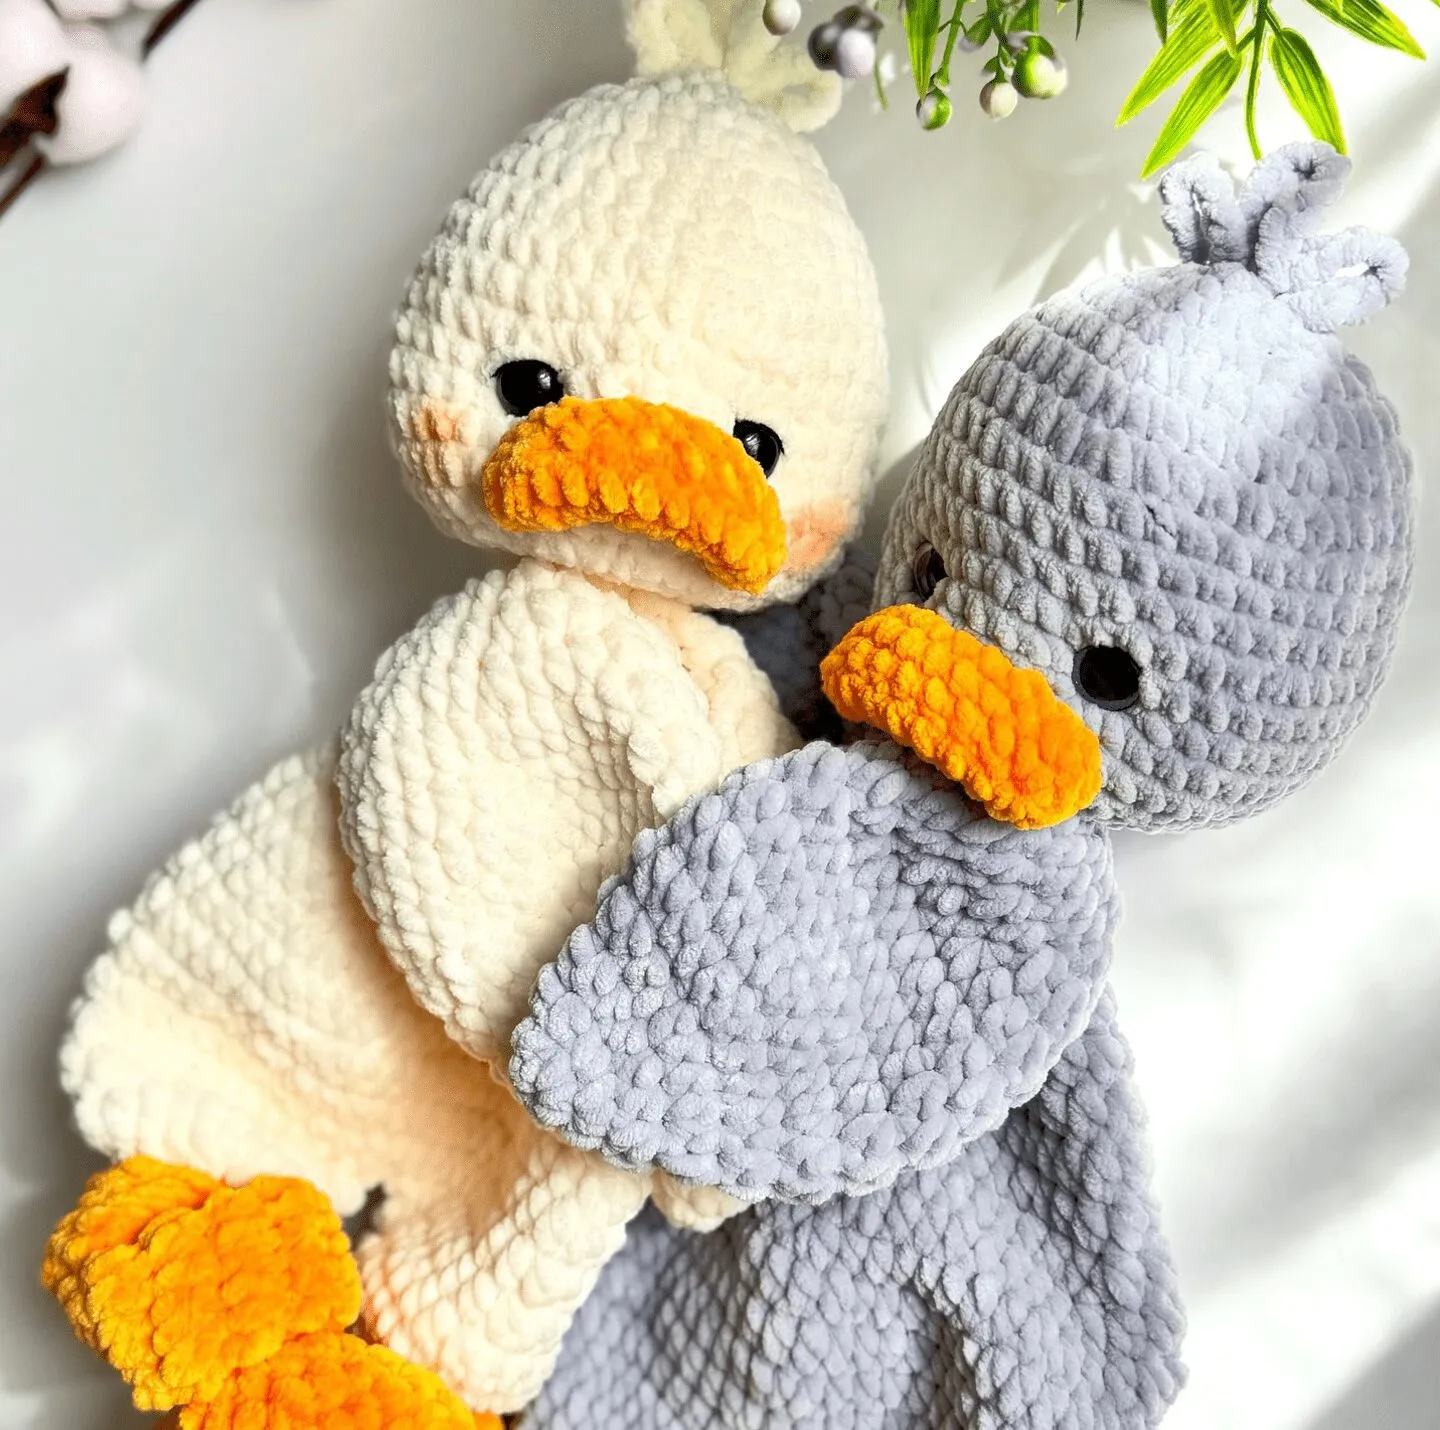
If you are looking for a gift full of tenderness and meaning, this duck amigurumi is the perfect project. Loveys are those inseparable companions that give little ones security, comfort and a sense of peace during their first years of life. Today you will learn how to create this adorable amigurumi toy, ready to become a best friend for adventures and dreams.
This step-by-step guide is designed so you can enjoy every stitch while this sweet character comes to life.
About this character: the friendly duckling
Ducks are iconic childhood figures, present in classic stories such as “The Ugly Duckling” and in unforgettable cartoons. They represent curiosity, nature and innocence. This duck amigurumi, designed as a lovey, brings back that soft and friendly essence from early books and park games, becoming a timeless symbol of tenderness.
This free pattern is shared by the talented designer @amimitoys_lg. Please follow her on social media and tag her when you publish your finished works to thank her generosity.
Materials Needed
- Cotton yarn in the color you want for the body: white, yellow, gray or another shade.
Advertisement / affiliate link. As an Amazon Associate, I earn from qualifying purchases.
- Orange cotton yarn for the beak and feet.
- Crochet hook suitable for your yarn thickness; 2.5 mm or 3 mm is recommended.
- Synthetic stuffing or silicone fiberfill.
- Safety eyes in a size that matches your yarn.
- Scissors and yarn needle.
- Blush for the cheeks.
Before you start: useful supplies for this amigurumi
Check yarn, eyes, stuffing, and accessories before crocheting so you do not get stuck halfway through the project.
- Safety eyesAdds a clean, even expression to the doll.View options
- Cotton yarnPick similar colors before you start.View options
- Yarn needleEssential for sewing pieces and hiding ends.View options
- Crochet hookThe right size keeps stitches firm and neat.View options
- PinsUseful for positioning pieces before sewing.View options
- Safety noseA small detail that improves the finish.View options
Links open Amazon searches related to each material.
If you have questions about yarns or tools, see our complete amigurumi materials guide.
Crochet Abbreviations
- V: Round
- Cad: Chain
- Am: Magic ring
- Pb: Single crochet
- Pm: Half stitch
- Pd: Slip stitch
- Pa: Double crochet
- Pma: Half double crochet
- Aum: Increase
- Dis: Decrease
- BLO: back loop only
- FLO: front loop only
You can review all the techniques in our crochet abbreviations guide for amigurumi.
Important note: when the pattern mentions a loop, it means the stitch or loop of the chain where you will crochet. If you see BLO or FLO, take only one strand of the stitch.
Duck Amigurumi Pattern Instructions
Head
ROUND 1: 6 Pb in Am (6)
ROUND 2: 6 Aum (12)
ROUND 3: (1 Pb, 1 Aum) ×6 (18)
ROUND 4: (2 Pb, 1 Aum) ×6 (24)
ROUND 5: (3 Pb, 1 Aum) ×6 (30)
ROUND 6: (4 Pb, 1 Aum) ×6 (36)
ROUND 7: (5 Pb, 1 Aum) ×6 (42)
ROUNDS 8-10: 42 Pb (3 rows)
ROUND 11: (6 Pb, 1 Aum) ×6 (48)
Insert the safety eyes between rows 12 and 13, with 8 Pb between them.
ROUNDS 12-15: 48 Pb (4 rows)
ROUND 16: (6 Pb, 1 Dis) ×6 (42)
ROUND 17: (5 Pb, 1 Dis) ×6 (36)
Begin stuffing the head firmly.
ROUND 18: (2 Pb, 1 Dis) ×9 (27)
ROUND 19: (1 Pb, 1 Dis) ×9 (18)
ROUND 20: 9 Dis (9)
Cut the yarn and close the hole with a yarn needle.
Beak
ROUND 1: Make 9 Cad.
ROUND 2: Start in the second chain from the hook: 7 Pb, 4 Pb in the last chain to turn, continue on the other side of the chain with 6 Pb and finish with 4 Pb in the last chain at the other end (21).
ROUND 3: Lift 1 Cad, 7 Pb, Aum, 1 Pb, Aum, 8 Pb, Aum, 1 Pb, Aum (25).
ROUND 4: 25 Pb.
Fasten off and leave a long tail for sewing. Sew the beak under the eyes, shaping it with a natural curve.
Forelock
Insert the hook into a loop next to the Am of the head and crochet 8 Cad; return with Pb over the chains.
Take another loop of the Am and make 10 Cad; return with Pb.
Insert the hook again into a third loop of the Am, make 8 Cad and return with Pb.
Embroider eyelashes with thin black thread and apply blush to the cheeks as desired.
Wings x 2
ROUND 1: 6 Pb in Am (6)
ROUND 2: 6 Aum (12)
ROUND 3: 12 Pma (12)
ROUND 4: (1 Pma, 1 Aum) ×6 (18)
ROUND 5: (2 Pma, 1 Aum) ×6 (24)
ROUND 6: (3 Pma, 1 Aum) ×6 (30)
ROUNDS 7-9: 30 Pma (3 rows)
ROUND 10: (3 Pma, 1 Dis) ×6 (24)
ROUND 11: (2 Pma, 1 Dis) ×6 (18)
ROUND 12: (1 Pma, 1 Dis) ×6 (12)
ROUND 13: 6 Dis (6)
Fold in half and crochet 3 Dis, joining both sides. Fasten off and leave yarn for sewing; hide the excess inside the wing.
Tail
ROUND 1: 6 Pb in Am (6)
ROUND 2: 6 Aum (12)
ROUNDS 3-4: 12 Pb (2 rows)
ROUND 5: (1 Pb, 1 Aum) ×6 (18)
Stuff lightly and sew to the back of the body.
Feet and Body
ROUND 1: Make 9 Cad.
ROUND 2: Start in the second chain from the hook: 7 Pma, 4 Pma in the last chain to turn, continue on the other side of the chain with 6 Pma and finish with 4 Pma in the last chain at the other end (21).
Important: this round is worked as an oval, crocheting on both sides of the starting chain. That is why, although you start with 9 chains, you complete 21 stitches by working around it.
ROUND 3: Aum, 7 Pma, Aum, 1 Pma, Aum, 8 Pma, Aum, 1 Pma (25)
ROUND 4: 25 Pma.
ROUND 5: Dis, 8 Pma, 2 Dis, 9 Pma, Dis (21)
ROUND 6: (1 Pma, Dis) ×7 (14)
ROUND 7: Dis, 4 Pma, 2 Dis, 2 Pma, Dis (10)
Stuff the foot lightly.
ROUNDS 8-28: 10 Pma (21 rows)
ROUND 29: 10 Aum (20)
Change to the body color at the end of this round.
ROUND 30: (8 Pma, 2 Aum) ×2 (24)
ROUND 31: 24 Pma.
Make a Pd and cut the yarn. Crochet another foot the same way, but do not cut the yarn on the second one because you will continue from there to join the body.
Body Join
ROUND 32: 24 Pma on the second leg, crochet 1 Pma in BLO to join, 24 Pma on the first leg, 1 Pma in BLO on the other side (50).
Note: in the next row, the increases must be distributed at the sides, front and back in the center.
ROUND 33: Aum, 11 Pma, Aum, 12 Pma, Aum, 11 Pma, Aum, 12 Pma (54)
ROUND 34: (8 Pma, Aum) ×6 (60)
ROUNDS 35-36: 60 Pma (2 rows)
ROUND 37: (8 Pma, Dis) ×6 (54)
ROUND 38: (7 Pma, Dis) ×6 (48)
ROUND 39: (6 Pma, Dis) ×6 (42)
ROUNDS 40-41: 42 Pma (2 rows)
ROUND 42: (5 Pma, Dis) ×6 (36)
ROUND 43: (4 Pma, Dis) ×6 (30)
ROUND 44: 30 Pma.
ROUND 45: (3 Pma, Dis) ×6 (24)
ROUND 46: (2 Pma, Dis) ×6 (18)
On the next row, use the moment to join or position the wings so they can be sewn.
ROUNDS 47-48: 18 Pma (2 rows).
Stuff the body firmly. Sew the body to the head and secure all yarn ends.
My Expert Tips for a Perfect Duck
Based on my experience crocheting loveys, I recommend paying special attention to the leg join. Since this is a lovey, the legs are usually long and flexible; avoid overstuffing the upper part so the duckling keeps that characteristic floppy movement.
Visual tip: if the feet look shorter in the photo, it is because they are often shown knotted. The pattern does include several long rounds, but when you tie a small knot they become visually shorter and look like the final image.
Do not forget the blush. That small cheek detail completely changes the doll’s expression, giving it immediate life and sweetness.
Did you crochet it? Leave a comment or share it on social media using #PatternsAmigurumi so I can see it.
Remember, the beauty of making amigurumi is that you can customize it as you like. Add a bow or change the colors so it matches the child’s personality. Do not wait any longer and start crocheting this duck amigurumi that will bring love and companionship.
Notice: This pattern is an original design by @amimitoys_lg and is shared here as a translation for educational and reference purposes only. All credit belongs to the creator.
Frequently Asked Questions about Crocheting a Duck Amigurumi
What materials do I need to start crocheting a duck amigurumi?
For this project you will need cotton yarn in the desired body color and orange for the beak and feet, a 2.5 or 3 mm crochet hook, synthetic stuffing, safety eyes, scissors, a yarn needle and a little blush for the doll’s cheeks.
Is it difficult for beginners to crochet a lovey?
Creating this duck amigurumi is a very rewarding process that requires basic crochet knowledge such as the magic ring, single crochet, half double crochet and increases. If you know those techniques, you can follow the step-by-step instructions easily.
How should amigurumi pieces be joined correctly?
The key to a neat finish is to use a yarn needle and leave long tails when finishing each piece. Position the parts with pins before sewing permanently and make sure you catch both pieces of the fabric well so the doll is firm and resistant.
Why do the duckling’s feet look shorter in the photo?
Because they are usually knotted. Although the pattern gives several rounds for long, flexible legs, tying a decorative knot shortens them visually and makes them look like the final image.
What does “loop” mean in this pattern?
In this context, “loop” means the stitch or loop where you should crochet. When the pattern mentions BLO or FLO, it tells you whether to take only the back loop or the front loop of the stitch.

Leave a reply